Showing posts with label vegetarian recipes. Show all posts

Friday, July 21, 2017

Homemade ice cream

Recipes: Vanilla bean ice cream, Summer peach ice cream


Vanilla bean ice cream with fruit

Very little says summer like ice cream, and homemade ice cream is the best of the best. With an electric ice cream maker, it's also very easy to make, and even with an old-fashioned manual crank maker, it's worth the effort. 

Don't think it can be a last minute decision, though, like 'oh let's have ice cream for dessert' as you start dinner at 5:30 p.m. There is some time involved as the ice cream maker tub chills (6 to 24 hours) and as the custard that will become the ice cream chills (3 hours to overnight) before it goes into the ice cream maker. You must plan ahead a bit, and you will be well rewarded!

The ice cream maker I bought is a Cuisinart with a capacity of 2 quarts. There are several different brands available, and most of them include a tub which must be frozen for 6 to 24 hours before ice cream can be made in it. I recommend keeping this tub, wrapped in a plastic bag, in a corner of your freezer, preferably in the back which is coldest, so it's ready to go when you are.


Vanilla Bean Ice Cream


  • 1 vanilla bean
  • 2 cups heavy cream
  • 2/3 cup whole milk
  • 1 cup sugar
  • 2 large eggs


With a knife halve vanilla bean lengthwise and scrape seeds into a large heavy saucepan. Sitr in pods, cream, milk, and sugar. Bring mixture just to a boil (watch it carefully or it'll boil over and make a mess!), stirring occasionally. Remove pan from heat.

In a medium bowl, lightly beat eggs. Add hot cream mixture to eggs in a slow stream, whisking, and the pour the mixture back into the saucepan. Cook custard over moderately low heat, stirring constantly, until a thermometer registers 170F. This will only take a few minutes. Do not let it boil.

Pour custard through a sieve into a clean bowl and cool. Chill custard, its surface covered with wax paper or cling film, at least 3 hours and up to 1 day.

Freeze custard in an ice cream maker according to the directions for your machine. If you want the ice cream to be hard, once it's done (about 35 minutes for most), transfer it to an airlight container and put in freezer to harden. It may be kept in the freezer for a week, if you can stay away from it for that long.

This ice cream is very rich. It is, of course, amazingly delicious. The next time I make it, I may try substituting 1 cup half and half for 1 cup of the heavy cream, just to see if it's still fabulous and I can save a few calories.


Summer Peach Ice Cream

Disclaimer: I have not yet made this ice cream, but I have it on the word of a VERY reliable friend/cook that it is fabulous. Since peaches are in season, I'll be trying it next! The recipe comes from The Greens Cookbook, a 1980's compilation from the celebrated vegetarian restaurant Greens in San Francisco.

  • 1 vanilla bean
  • 1 cup whole milk
  • 2 cups heavy cream
  • 3 egg yolks
  • 1/2 plus 1/3 cup sugar
  • 5 or 6 peaches (use any kind of peach as long as it is ripe and full of flavor)

Slit the vanilla bean in half lengthwise and put it in a saucepan with the milk and 1/2 cup of the cream. Set it over a medium low flame to heat, and while it is warming, beat the yolks and the 1/2 cup sugar together.

Stir the hot milk slowly into the yolks and sugar, taking care not to create too many bubbles. Return the mixture to the pan and set it over low heat, stirring constantly with a wooden spoon. Check the back of the spoon frequently, and as soon as the custard is thick enough to coat it, remove it from the heat and pour it directly into a bowl. This will only take a few minutes. (Be careful not to let the custard come to a boil, or it will curdle.)

Pour the cooked custard through a strainer into a clean bowl, then stir in the remainder of the cream. Scrape the seeds out of the vanilla bean into the custard, put the pods back in, and set the custard in the refrigerator, with waxed paper on its surface, until it is thoroughly cooled.

Peel the peaches and slice them. Use a potato masher or large fork to break them into a very coarse puree that has plenty of small chunks of fruit. Stir the remaining 1/3 cup sugar into the fruit, and let it sit until it has dissolved, about an hour.

When the custard is well chilled, remove the vanilla pods, add the peaches, and freeze according to the instructions of your ice cream machine.


Thursday, September 1, 2016

Heirloom tomato chutney

Recipe: Heirloom tomato chutney


What a year for tomatoes! We have a bumper crop in our front yard in Oakland, big delicious heirlooms, and I'm on the lookout for ways to use and preserve them before their sweetness fades. Ah, the drama of tomato season! Use them quickly, or lose them!

Today I made tomato chutney using a recipe based on one from Jamie Oliver. I made a double batch, because I have so many tomatoes. It lasts four months in the refrigerator. I know we'll use this chutney before four months have passed, but it's something to think about.

I'm looking forward to eating it with meats - lamb, braised pork, and chicken. It's sweet, tart, and a bit spicy. Oh so good! Jamie says it's wonderful on a piece of good bread with cheddar - will definitely try that too. Here's how to make it, and this is the recipe for a single batch. Double it if you dare!

Heirloom (or any) tomato chutney

  • 1 medium red onion, peeled and sliced thin
  • 1 pound (or a little more) fresh tomatoes, any or various colors, stemmed and chopped rough
  • 1 fresh red chili, stemmed, seeded, and chopped fine (or a small red bell pepper if you prefer not hot)
  • 5 tablespoons red wine vinegar
  • 1/2 cup brown sugar (scant, i.e. not packed, if your tomatoes are as sweet as mine are)

In a heavy medium saucepan, combine all ingredients and add a little sea salt to taste. Mix well to combine.


Cook over medium heat for 45 minutes, or until it reduces to a fairly thick jam-like consistency.


Meanwhile, sterilize a pint jar with a lid by submerging it in boiling water for 10 minutes. Drain the jar and fill it with chutney. Cap it and refrigerate it when it is cooled. Will keep in the refrigerator for up to four months. As if you won't eat it before then! Yum.

Sunday, January 24, 2016

Black-eyed peas and a Happy New-ish Year!

Recipes: Black-eyed peas, Seared lamb loin chops


Yes, I know the season for Happy New Year has more or less passed. I was out of town for New Year's, however, so I didn't get to make traditional good luck black-eyed peas like I usually do. Better late than never, don't you think? I decided to make them last night with lamb chops, and they were pretty delicious!

This method of cooking dried black-eyed peas will work for almost any dried pea or bean. The difference is black-eyed peas (and lima beans and split peas) cook a lot more quickly than other kinds of dried beans, and without soaking. To me, black-eyed peas are one of the tastiest of the dried legumes and they can easily be made in an hour for dinner. I think you'll want to add this one to your cooking repertoire!

Black-eyed Peas


I pack a lot of vegetables into my black-eyed peas. Why not make them as tasty and nutritious as possible? Then they can stand alone as a vegetarian or vegan dinner, possibly served with steamed brown or white rice, or they can be a base for a simply cooked meat, like the seared lamb chops I served them with last night.

  • 1 cup picked over and rinsed dried black-eyed peas
  • 1 tablespoon butter and 1/2 tablespoon olive oil
  • 1/2 cup chopped onion, white or yellow
  • 1 medium carrot, peeled and chopped small
  • 1 red or yellow bell pepper, stemmed and chopped
  • 1 small dried mild or spicy pepper, seeded and broken into small pieces, or 1/2 teaspoon red pepper flakes
  • 1 small bay leaf
  • sea salt to taste
  • 1/2 teaspoon dried thyme

In a heavy pot or Dutch oven, melt butter and heat oil together. Saute the onion, carrot, bell pepper, and dried pepper for a few minutes, stirring, and then turn the heat to low, add a sprinkle of salt, cover the pot, and let it cook slowly for 15 minutes. Stir it once during this time.

Add the black-eyed peas and stir them into the vegetables. Add 2 cups water and the bay leaf and bring the pot to a boil. Turn the heat down to medium low and simmer the peas, uncovered, until they are tender. This should take about 40 minutes, and you will need to check the pot and stir it several times while it is cooking. You should always be able to see some liquid. If the liquid cooks away, add another half cup of water. Toward the end of 30 minutes, taste the peas to see if they are soft. When they are nearly soft, and not before, add 1/2 teaspoon salt (or to taste) and the dried thyme. Stir well and continue to cook over medium low heat until the peas are completely soft but not falling apart. Remove the bay leaf and serve.

You can let the peas sit, covered and with the heat off, while you prepare meat or whatever you are serving with them. For the lamb chops, I used tiny loin chops so I planned on two per person. I salted and peppered them when I started the peas, so the seasoning would marinate into the meat a bit. Once the peas were done, I heated a cast iron skillet with a bit of olive oil and sauteed the chops 3 minutes on each side over high heat. Then I let them sit on a plate for 10 minutes to finish cooking and adjusting their juices. To serve, I put two big spoonfuls of peas in a soup plate and arranged the chops on top, pouring juices from the chops that had gathered on the plate over it all. I finished it off with a little dollop of mango chutney on top of each chop.

We ate in front of the fireplace and a roaring fire. It tasted great on a rainy winter night!
Happy New-ish Year!!

Thursday, March 26, 2015

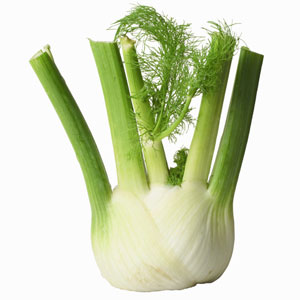
Why not try . . . fennel?

Recipes: Braised fennel and leeks, Fennel salad, Grilled fennel


Don't we love vegetables!? Yes we do, but sometimes we get just a teeny bit tired of the vegetables we love. Same old, same old. That's why it's fun to try something new.

Of course I already knew about fennel. I'd eaten it in restaurants mixed in with other things, but I'd never cooked with it. Wasn't it very licorice-y? I do like black licorice, but that's candy. Wouldn't it be too strong and maybe sweet? It just didn't seem like it would be good as a vegetable.

Oh, how wrong I was!

Braised Fennel and Leeks


  • 2 medium or 3 small leeks
  • 1 small to medium fennel bulb
  • Sea salt and freshly ground black pepper
  • 1/4 cup good chicken stock, or vegetable stock if you want to make this dish vegetarian
  • 2 tablespoons butter

Cut ends off the leeks and cut them in half lengthwise. Wash them very carefully as they often harbor sand. Then cut them in half crosswise and arrange them in a medium skillet or dish that can go both on the burner of the stove and in the oven.

Cut the stalks off the fennel bulb and cut the bulb in half lenthwise. Cut slices or wedges from the bulb halves, no thicker than the pieces of leek. Arrange the fennel in the dish with the leeks.

Turn the oven on to 350 degrees F. 

Pour the chicken stock over the vegetables and sprinkle the butter cut in pieces over it all. Add a small amount of sea salt and a good grind of pepper. Heat over medium flame until the liquid boils, then turn down the flame and cook for a minute or two while the oven finishes heating.

Turn off the flame and cover the skillet/dish loosely with aluminum foil. Place in the heated oven for about 30 minutes, or until the liquid turns syrupy and the vegetables are very tender.

Serve next to anything - meats, rice, even pasta. You'll find it has the tiniest, most delicate, hint of aniseYum!!!

Fennel and Arugula Salad


Arugula and shaved or very thinly sliced fennel bulbs are wonderful tossed with a light vinaigrette made with sea salt, a little freshly ground pepper, 2 teaspoons fresh lemon juice, and 2 tablespoons extra virgin olive oil. Variations on this theme can add to the deliciousness - sliced radishes and shaved Parmigiano-Reggiano cheese are especially good.

Grilled Fennel


Cut off the leafy tops and stem ends of fennel bulbs. Cut the bulbs in half lengthwise and cut each half into two or three equal wedges. Salt them and steam them for about 20 minutes, until the fennel is tender but still intact.

Make a small vinaigrette for brushing on the wedges before and after grilling: A few chopped fennel fronds, a tablespoon or so of extra virgin olive oil, a squeeze of lemon, and a little chopped anchovy if you wish. 

Thread the steamed wedges on long skewers and brush with the oil mixture plus season with salt and pepper. Grill over prepared coals until nicely browned, turning frequently. Brush again with oil mixture just before serving.

Friday, January 30, 2015

Some riffs on a bag of cauliflower

Recipes: Romesco sauce, Cauliflower gratin


I came back from a shopping trip to Costco with a big bag of cauliflower florets a couple of weeks ago. In case you're not familiar with Costco, it's a membership warehouse store with really good prices for lots of things and, incidentally, is also famous for high-quality meats, vegetables, and fruits. You just have to buy a lot as it all comes in big packages. Costco is the main reason I have two refrigerator freezers plus a chest freezer and a whole system of wall shelves in the basement - I have to store all those supplies I get at Costco.

I don't often buy vegetables there, except for onions and potatoes, because it's just too much to use before they go bad. This time I couldn't resist the big bag of cauliflower. It's cauliflower season and I love cauliflower. It looked so fresh and good. The bag had the equivalent of 2-plus whole cauliflowers cut into medium florets. Lots of cauliflower for two people.

I worked at it. The first thing I did was serve raw cauliflower with Romesco sauce as an appetizer when my friend Jackie came over for our usual Monday night dinner together. It's January and of course we're all trying to shave off those extra coupl'a pounds we put on over the holidays. Raw veggies are a healthy lo-cal option. On top of that, Romesco is made with roasted red bell peppers (more veggies) and, yes, almonds. It's kind of exotic and is delicious with all kinds of raw and cooked vegetables. Here's how to make it.

Romesco Sauce


Makes about 1 cup of sauce. If you want less, you can halve this recipe. Romesco freezes well, though, so you could make the whole thing and have some already made for next time.
  • 1 slice country-style white bread, or gluten-free bread if desired
  • 2 teaspoons olive oil
  • 1/2 cup almonds, roasted (but not salted). You can roast raw almonds in a dry skillet for a few minutes if that's what you have.
  • 3 garlic cloves
  • 1 teapoon ground red chile (or red pepper flakes to taste)
  • 4 ripe Roma tomatoes, or one 14-oz can drained chopped tomatoes (not seasoned)
  • 1 tablespoon fresh parsley leaves
  • Sea salt and freshly ground black pepper
  • 1 teaspoon sweet paprika
  • 1 large red bell pepper, roasted and peeled*, or 1 small jar roasted red bell peppers
  • 1/4 cup sherry vinegar (I have also used 1 tablespoon dry sherry and scant 1/4 cup rice vinegar)
  • 1/2 cup extra virgin olive oil (if you can get Spanish olive oil, go for it)

Tear the bread into pieces and fry in a little olive oil until golden and crisp. When cool, grind the bread, nuts, garlic, and chile in a food processor with the metal blade. Add everything else except the vinegar and oil and process until smooth. With the machine running, gradually pour in the vinegar, then the oil. Taste to make sure the sauce has plenty of piquancy (vinegar and/or ground chile) and enough salt.

Now all you have to do is take out a few cauliflower florets and arrange it on a plate around a bowl of Romesco. Quite pretty, isn't it?

*To roast a pepper, remove the top and any seeds inside. Then cut the pepper in half and flatten it skin side up on a foil liked broiler pan. Put it under a hot broiler until the skin turns mostly black. Take it out of the broiler, carefully gather it all into a pile and cover it with an overturned bowl. After it's done steaming and cools enough to handle, the blackened skin will come off easily with a paring knife. Then it's ready to use.

* * *
Still had quite a bit of cauliflower left in the bag so, in line with the desire to eat a bit more healthily in the New Year, I started snacking on raw cauliflower whenever I felt like diving into some cheese and crackers. It was really a delicious alternative and couldn't have hurt the effort!

As the amount of cauliflower dwindled, I decided to cook a little of it for dinner one night. This simple gratin was so quick and easy, and it was "simply" delicious. I served it with chicken.

Cauliflower Gratin with Butter and Parmesan


  • 1/2 medium or one small cauliflower, cut into medium florets
  • Butter
  • Sea salt
  • 2/3 cup freshly grated Parmigiano-Reggiano cheese

Preheat the oven to 400 degrees F.

Boil a big pot of water. Put about half a cauliflower's worth of florets, medium to large size, in the water and cook it for 5 minutes. Drain it and let it cool.

In an oven-to-table baking dish, smear the bottom and sides with a little butter. Arrange the cauliflower florets so they overlap each other slightly, roof-tile fashion. Sprinkle with sea salt and 2/3 cup grated Parmesan cheese. Dot liberally with butter.

Bake on the uppermost rack of the preheated oven until a light crust forms on top, about 15 to 20 minutes.

Take it out of the oven and let it settle a few minutes before serving. Delicioso!
 
* * *

Before I knew it, that big bag of cauliflower was empty! Yum!

Tuesday, January 20, 2015

Still soup season: Butternut squash and ginger

Recipes: Butternut squash soup


It's January (Happy New Year to you!) and, while it's no longer raining as much as we wish it would, the evenings are cold. Soup still tastes really good, so I'm taking this opportunity to include another of my favorite winter recipes - butternut squash soup with ginger.

The story of this soup takes us halfway around the world, to Australia and back. I traveled there with my family years ago, and while staying in Manly Beach outside Sydney, I tasted a wonderful soup called Pumpkin Soup in a small local restaurant. I begged the chef to give me the recipe, which was actually made with butternut squash rather than what we would call pumpkin, and he finally did. Or so I thought. When I got home I made the recipe several times, but it never tasted quite as good as I remembered it did in Manly Beach. Something was missing. Something important. Then one day I was looking through a magazine and saw a recipe for butternut squash soup. It contained an apple. I knew right away that was what was missing - a hint of sweet, a hint of tart. I added an apple to the recipe that chef in Australia had given me and there it was. Perfection. Never give up!


Butternut Squash Soup with Ginger


Note that you must bake the squash for 1 hour before making the soup. This can be done even a day or so in advance, and then you can cover the whole squash and refrigerate it for future last-minute use.
  • 1 small to medium butternut squash, cut in half, seeded, and baked cut side down at 375 F for 1 hour. Scrape the soft flesh out from the skin with a large spoon to add it to the soup. Discard the skin.
  • 1 small onion, chopped
  • 2 cloves garlic, minced
  • 1/4 cup (4 tablespoons) butter
  • 2 tablespoons all-purpose (or gluten-free) flour
  • 3 cups chicken or vegetable broth (canned or home made)
  • 1 medium apple, peeled, cored, and chopped. I use a MacIntosh or a Pink Lady or a Granny Smith; any good-tasting sweet-tart apple will do.
  • 1/2 teaspoon dried thyme
  • 1/4 teaspoon salt
  • 1/2 cup half-and-half or heavy cream
  • freshly grated ginger root

Saute the onion and garlic in the butter in a medium soup pot. Add the flour, stirring until smooth. Cook, stirring, one minute. Add the broth and bring to a boil, stirring. Add all remaining ingredients except cream and ginger and simmer 10 minutes.

Let cool slightly, then puree in a food processor or with an immersion blender until smooth. Return to the pot if necessary, add cream and ginger, and reheat. Serve with more grated ginger, according to your taste.

This soup freezes well if you freeze it prior to adding the cream.

This soup is gluten-free if you use gluten-free flour mix instead of flour and is vegetarian if you use vegetable broth instead of chicken broth.


Friday, December 5, 2014

'Tis the season for soup!: Split pea

Recipe: Split pea with ham (or not) soup


Cold nights, hot soup. Yum. It's a great time of year to haul out the soup pot.


Split pea soup is a classic that's easy to make and uses common ingredients. It's also versatile! Don't want to make it with ham? Use smoked chicken or turkey instead. Want to make it vegetarian? Leave the meat out altogether. Either way, it'll be delicious and perfect in front of a roaring fire. Or snuggled up on the sofa listening to records. Or, you know, whatever you like to do on a cold winter night!

Split Pea Soup with Ham (or not)


  • 1/2 pound (8 oz. or 1 cup) split green peas, picked over. Split peas often include small stones, so look them over carefully.
  • 1 medium smoked ham hock, cut in two or three pieces (or smoked chicken or turkey meat)
  • 1/2 teaspoon dried thyme
  • Sea salt
  • 4 cups water
  • 1 carrot, peeled and chopped medium
  • 1 medium onion, chopped
  • 1 rib celery, chopped medium
  • 3 ounces deli ham or ham slice, chopped medium
  • 1 tablespoon fresh lemon juice
  • Freshly ground black pepper

Put the peas, ham hock, thyme, 1/2 teaspoon salt, and water in a medium soup pot or Dutch oven and bring it to a boil. Turn the heat down to simmer, cover, and cook for about an hour, stirring now and then. Be sure to stir from the bottom of the pot so the peas don't stick.

Stir in the carrots, onions, and celery. Continue to simmer until the peas have softened and broken down so the soup is thickened, about 25 minutes.

Remove the ham hock and add the deli ham. Continue to simmer for 10 minutes. When the hock is cool enough to handle, remove any meat and add it to the soup. Stir in the lemon juice and season with salt and pepper to taste before serving.

Split pea soup can be made and refrigerated for up to 3 days, or frozen for up to 2 months. That way you could make it on a weekend and have it ready to serve during the week when you're starving and don't have time to make dinner. Double the recipe if you want to make enough for several meals. Simply reheat the soup over low heat or in the microwave, adding a little water and stirring well if it's too thick.

Split pea soup is gluten-free, and is also vegetarian if made without the ham hock and deli ham.

Thursday, November 20, 2014

Mac 'n cheese update (improving on a classic)


Recipe: Cauliflower mac 'n cheese


Everybody loves mac 'n cheese. I've made the same recipe for years, with a white sauce to which you add cheese and finally the cooked macaroni. It's not hard but it does take a little time and effort to make. Recently, I looked online for a recipe because I couldn't find my old recipe - it was in a magazine and I was too lazy to look for it. See what the Internet does to us! Anyway, I found this recipe that originally came from Jamie Oliver. It's so much easier and truly delicious - I think even better than my original.

Here's a version with cauliflower, which adds tons to the taste even though it's already good. And it's a great way to get your veggies while pigging out on pasta. You have to try this!

Cauliflower Mac 'n Cheese

  • 1/2 head of cauliflower, cut in small florets and stems sliced
  • 10 ounces dried macaroni
  • 6 ounces of sharp or extra sharp cheddar cheese, grated
  • 4 ounces grated Parmesan plus a couple tablespoons for sprinkling before baking
  • 2 tablespoons chopped flat-leaf parsley
  • Sea salt and freshly ground pepper
  • 1/2 cup sour cream (I use light sour cream)
  • A pinch of ground cumin
  • A pinch of cayenne

Heat the oven to 375 degrees.

Bring a large pot of water to a boil. Add 1 1/2 tablespoons salt. Add the macaroni and the cauliflower florets and sliced stems, and cook until the macaroni is nearly done, about 6 minutes.

In a small heavy saucepan, put the cheeses and sour cream over very low heat to melt. Or, alternatively, set a heat-proof bowl in a steamer over the cooking macaroni and cauliflower and put the cheeses and sour cream in it. Either way, when the cheeses start to  melt, stir them until they are smooth. If you have set a bowl over the macaroni water, remove it carefully - it will be hot. Add salt, pepper, cumin, and cayenne to the cheeses.

Taste the macaroni when it has cooked 6 minutes - it should be the tiniest bit hard yet. Scoop 1/2 cup of the pasta water out and set it aside. Then drain the macaroni and cauliflower in colander and  return it to the pot. Add the melted cheese mixture to the macaroni and cauliflower and stir well. Add the reserved pasta water and the parsley and stir again to combine.

Pour the mac 'n cheese into a baking dish. Sprinkle with a couple tablespoons of grated Parmesan. I also like to sprinkle a little more cayenne on the top (cause I like it spicy!). Put it in the oven for about 20 minutes, or until it's golden and bubbling.

Serve with a kale or baby greens salad. Yum!

Buon appetito!

This recipe for mac 'n cheese is vegetarian and can be gluten-free, if made with gluten-free macaroni, like quinoa and brown rice macaroni.

Wednesday, October 29, 2014

Secrets of a souffle (ssshhh)

Recipes: Cheddar cheese souffle, Baby greens salad with persimmon and balsamic vinaigrette


Mention making a souffle and some cooks will run for the hills. "Not me," they say. "Too hard, too fussy." And to that I say, "Oh pshaw." It's not true, you know, that it is hard, or that it is finicky and everything has to happen at the last minute. There are a few "secrets", and I'm about to divulge them. I made this cheese souffle (the very one pictured here) in about 45 minutes the other day while my friend Jackie was over visiting. She actually helped whip up the egg whites, but there would have been ample time to do that if I had been in the kitchen alone. Come on, give it a try.
Oh, I didn't mention the real reasons for giving souffle a try. Nothing, I mean nothing!, is more delicious than a good cheese souffle with a salad. And it makes a dinner that's beautiful to look at as well as yummy. Those are the reasons.


Cheddar Cheese Souffle


The Secrets: I'll give you the secrets right up front, so you can think on them.

1. Take the eggs out of the fridge 30 minutes or so ahead of time, or even leave them out for a couple of hours, so they come to room temperature. This makes whipping the egg whites easier.

2. Separate the eggs and put the whites and yolks in separate small bowls. Do this before you do anything else. This will also help bring them to room temperature faster. Note: there are 4 egg yolks and 6 egg whites in the recipe. Unless you have an immediate need for the 2 extra yolks, just discard them.

3. A regular souffle dish will work great, but I like to use a shallower gratin dish instead - see the one in the photo above. The shallower dish makes for more crust, which many people like best, and the souffle cooks a little faster. I find it's more fool-proof, and who doesn't love that?

4. Prepare your baking dish, souffle or gratin, right after you separate the eggs. Then it's done and you're not scrambling to do it at the last minute.

5. Get all your ingredients out and ready, as you should always do. Grate your cheese in advance. Remember mise en place? And KISS (Keep It Simple Silly) from an earlier post about organizing? Excellent, you're on your way.

The Recipe

  • Butter, plus 2 tablespoons freshly grated Parmesan for preparing the baking dish.
  • 1-1/4 cups warmed milk or combo milk and cream (I used 3/4 cup 1% and 1/2 cup half-and-half)
  • 3 tablespoons butter
  • 3 tablespoons flour (or gluten-free flour, if you wish)
  • Sea salt and freshly ground pepper
  • 1/2 teaspoon Hungarian paprika or ground red chile (like New Mexico ground chile)
  • 4 large egg  yolks
  • 1 cup (4 ounces) grated cheddar. I used white extra-sharp New York cheddar; use whatever cheddar you like, white or orange
  • 6 egg whites

Preheat the oven to 400 F. Separate the eggs into separate bowls. Butter a 6-cup souffle dish or an 8-cup gratin dish and coat it with the Parmesan. Heat the milk.

Melt the butter in a heavy saucepan. When foamy, whisk in the flour and continue cooking over low heat for a few minutes, whisking. Whisk in the warm milk and stir well for a minute or so while it thickens, then add 3/4 teaspoon salt and a few grinds of black pepper, plus the paprika (or chile). Take it off the heat. Beat the egg yolks into the milk mixture one at a time until well blended, then stir in the cheese. Don't worry if it's not perfectly smooth.

Beat the egg whites with a pinch of salt until they form firm peaks. You can use a whisk or an electric mixer with the whisk attachment. Do not do this step in advance; the milk/egg base will be fine for the few minutes it takes. Stir a quarter of the beaten egg whites into the base to lighten it, then carefully fold the rest of the whites in with a spatula.

Pour the souffle batter into the prepared dish, then put it in the center of the oven and lower the heat to 375 F. Bake for 30 minutes or until golden and just a bit wobbly in the center.

Serve immediately with a salad as pictured below, or any steamed vegetable. Piece of cake, right?


Baby Greens Salad with Persimmon and Balsamic Vinaigrette

This is a simple salad, and delicious. The balsamic vinaigrette is versatile too - wonderful on most salad combinations and on cooked green vegetables.
The Vinaigrette
In a small bowl, combine 1/2 teaspoon sea salt with 1/2 teaspoon sugar. Add 1 tablespoon balsamic vinegar. Stir with a fork or small whisk. Add 4 tablespoons extra virgin olive oil and stir vigorously till well combined. Set aside until just before you're ready to serve dinner.
The Salad
  • Toast slivered almonds in a small frying pan until they are lightly browned.
  • Slice 1 fuyu persimmon (see photo below), removing the small seed.
  • Wash and spin dry any combination of baby lettuces, including some arugula if you have it.
  • Toss all with the dressing just before serving, reserving some of the almonds to sprinkle on top.
Image result for fuyu persimmon photo
Fuyu persimmon

Both dishes are vegetarian and gluten-free (if you use gluten-free flour in the souffle).

Wednesday, October 1, 2014

There's rice, and then there's rice

Recipes: Brown and wild rice with vegetables


I read an article in a magazine recently about rice. Why is rice so uninteresting as a side dish? Granted, plain rice is just the right thing under an Indian curry or a wonderfully spicy Thai dish, but as a side dish with meat and vegetables? Meh. Not so much.

The premise of the article (wish I could remember which magazine, but I can't) was that "enhanced" rice, as in a pilaf, is obviously more tasty than plain rice because it contains flavorful ingredients, like vegetables and herbs. And that this enhancing is easy to do. In fact there's a kind of formula you can use to enhance any kind of rice or combination of rices. Here's basically how it works.

  • Saute finely chopped aromatics (vegetables) in oil or butter, or a combination of both, until they are tender and barely browned. A good choice to start would be onions, carrots, and possibly garlic. Worth considering as a future experiment would be zucchini, celery, butternut squash, artichoke hearts, mushrooms, kale, or any other vegetable you like.
  • Add the rice and saute it with the aromatics for a few minutes, until it smells nutty. Perhaps add a little dry white wine at this point, and cook it until it is absorbed.
  • Use broth instead of water - chicken, beef, vegetable, mushroom - to give it more flavor. Heat the broth and add it to the pot. Turn the heat down immediately to low and cover the pot.
  • Once the rice is tender, turn the heat off and leave the pot covered on the stove for at least 15 minutes before serving.
  • Stir chopped fresh herbs, like parsley or oregano, into the rice before serving. Only fresh will work; if you want to use dried herbs, add them sparingly with the vegetables at the beginning.
Using these principles, I cooked rice for us to eat with salmon and steamed carrots and brussels sprouts the other day. It was so good we kept reaching for more rice, and almost forgot to eat the delicious wild salmon!

Brown and Wild Rice


  • 1 cup raw rice. I used a combination brown-and-wild-rice I bought at Trader Joe's. You can use any rice you like. Brown rice takes about 45 minutes to cook, wild rice takes a little longer so I cooked this combo for nearly an hour. White rice takes about 20 minutes to cook. You can definitely lift up the lid after it's been cooking for awhile and taste a grain. That, and whether the liquid has been absorbed, is the best way to tell if your rice is nearly done.
  • 1 tablespoon butter
  • 1 tablespoon olive oil
  • 2 cups chicken broth, heated (or use vegetable broth or mushroom broth to keep it vegetarian). Brown rice takes more liquid than white rice, which would only require 1-1/2 cups broth for 1 cup rice. Even so, when I lifted the lid of my pot after 45 minutes, I noticed there was still a lot of liquid and a grain of rice tasted nearly done. What did I do? Of course I poured off most of the liquid into the sink, using the pot lid to keep the rice in the pot. Then I put it back on the burner on low, covered it again, and cooked it for another 10 minutes or so, until all the liquid had been absorbed. Rice is not fragile!
  • 1 carrot, peeled and chopped
  • 1/2 onion, chopped
  • A splash of dry white wine
  • A handful of fresh parsley leaves, chopped
 Melt the butter in a medium Dutch oven and add the olive oil. Saute the chopped onion and carrot in it over medium heat until the vegetables are soft and just beginning to brown.
Add the rice and stir well to combine. Saute, stirring, until the rice heats and begins to smell nutty. Add the wine and cook, stirring, until the wine is absorbed.

Meanwhile, heat the broth almost to boiling on the stove or in the microwave. Turn the heat down on the rice and add all the broth at once. Be careful, the broth could boil up. The idea is to heat the rice enough that the broth keeps its heat when it's added, which helps the rice cook without getting too mushy.

Cover the pot and turn the burner down to low. Set the timer for 45 minutes (in this case, since we're using brown and wild rice).

At 45 minutes, lift the cover and check to see whether the liquid has been absorbed. Taste a grain of rice to see if it is soft. If there is still quite a bit of liquid and the rice appears to be nearly cooked, pour some of it off, taking care to use the lid to keep the rice in the pot. Then re-cover and continue to cook over low heat until the rice is done and the liquid has been absorbed.

Turn the heat off and let sit, covered, for 15 minutes while you finish any other dinner preparations. When you are ready to serve the rice, stir in the chopped parsley.

Buon appetito!

This recipe for rice is both vegetarian and gluten-free.

Friday, June 27, 2014

Marlys granola (or have a good morning!)

Recipe: Granola


My sister-in-law Marlys makes really good granola. She bakes a big recipe of it, twice the size of the recipe below, and then stores it in those plastic cereal containers that I think are so neat. Whenever I go to visit her and my brother Jim, I look forward to eating her granola in the morning with fresh fruit and milk. It's a great way to start the day!

Fortunately she was willing to share her recipe. Don't you love people who share? And then I read an article about granola in Sunset Magazine, and tweaked her recipe a bit so it bakes in about 35 minutes instead of 60-70 minutes. All the better for us! Even though I messed with her original recipe, I'm still calling it Marlys Granola, because she was my inspiration! I'm making some today so I can eat it for breakfast tomorrow. . .

Marlys Granola


  • 3-1/2 cups old-fashioned rolled oats (not instant or quick-cooking)
  • 1 cup raw seeds, like sesame, pumpkin, chia, flaxseed
  • 1 cup raw nuts, like sliced almonds, pecan pieces, walnut pieces, pine nuts
  • 1 teaspoon sea salt
  • 3/4 teaspoon cinnamon and 1/4 teaspoon cardamom (or 1 teaspoon cinnamon and no cardamom)
  • 1/2 cup extra-virgin olive oil (or canola oil). You could also use half-half coconut oil and olive oil for a coconut flavor.
  • 1/2 cup maple syrup (or honey)
  • 1 teaspoon vanilla extract
  • 1 cup dried fruit, like raisins, dried cranberries, chopped dried cherries, chopped dried apricots, chopped dried apple slices . . I could go on!

Preheat the oven to 350 degrees and line a rimmed baking sheet with parchment paper.

In a large bowl, combine oats, seeds, nuts, salt, and spices.

In a small bowl, whisk together oil, maple syrup (or honey), and vanilla. Add oil mixture to oat mixture and stir to combine well. Spread mixture evenly in lined pan.

Bake granola, stirring every 10 minutes, until light brown and fragrant, 30 to 35 mintues. Let cool in the pan, then stir in the dried fruit. Don't add the dried fruit till it's cool, or the fruit will become hard and stick to your teeth!

Store airtight and no longer than 3 weeks. Like it would last that long!