Showing posts with label gluten free recipes. Show all posts

Friday, July 21, 2017

Homemade ice cream

Recipes: Vanilla bean ice cream, Summer peach ice cream


Vanilla bean ice cream with fruit

Very little says summer like ice cream, and homemade ice cream is the best of the best. With an electric ice cream maker, it's also very easy to make, and even with an old-fashioned manual crank maker, it's worth the effort. 

Don't think it can be a last minute decision, though, like 'oh let's have ice cream for dessert' as you start dinner at 5:30 p.m. There is some time involved as the ice cream maker tub chills (6 to 24 hours) and as the custard that will become the ice cream chills (3 hours to overnight) before it goes into the ice cream maker. You must plan ahead a bit, and you will be well rewarded!

The ice cream maker I bought is a Cuisinart with a capacity of 2 quarts. There are several different brands available, and most of them include a tub which must be frozen for 6 to 24 hours before ice cream can be made in it. I recommend keeping this tub, wrapped in a plastic bag, in a corner of your freezer, preferably in the back which is coldest, so it's ready to go when you are.


Vanilla Bean Ice Cream


  • 1 vanilla bean
  • 2 cups heavy cream
  • 2/3 cup whole milk
  • 1 cup sugar
  • 2 large eggs


With a knife halve vanilla bean lengthwise and scrape seeds into a large heavy saucepan. Sitr in pods, cream, milk, and sugar. Bring mixture just to a boil (watch it carefully or it'll boil over and make a mess!), stirring occasionally. Remove pan from heat.

In a medium bowl, lightly beat eggs. Add hot cream mixture to eggs in a slow stream, whisking, and the pour the mixture back into the saucepan. Cook custard over moderately low heat, stirring constantly, until a thermometer registers 170F. This will only take a few minutes. Do not let it boil.

Pour custard through a sieve into a clean bowl and cool. Chill custard, its surface covered with wax paper or cling film, at least 3 hours and up to 1 day.

Freeze custard in an ice cream maker according to the directions for your machine. If you want the ice cream to be hard, once it's done (about 35 minutes for most), transfer it to an airlight container and put in freezer to harden. It may be kept in the freezer for a week, if you can stay away from it for that long.

This ice cream is very rich. It is, of course, amazingly delicious. The next time I make it, I may try substituting 1 cup half and half for 1 cup of the heavy cream, just to see if it's still fabulous and I can save a few calories.


Summer Peach Ice Cream

Disclaimer: I have not yet made this ice cream, but I have it on the word of a VERY reliable friend/cook that it is fabulous. Since peaches are in season, I'll be trying it next! The recipe comes from The Greens Cookbook, a 1980's compilation from the celebrated vegetarian restaurant Greens in San Francisco.

  • 1 vanilla bean
  • 1 cup whole milk
  • 2 cups heavy cream
  • 3 egg yolks
  • 1/2 plus 1/3 cup sugar
  • 5 or 6 peaches (use any kind of peach as long as it is ripe and full of flavor)

Slit the vanilla bean in half lengthwise and put it in a saucepan with the milk and 1/2 cup of the cream. Set it over a medium low flame to heat, and while it is warming, beat the yolks and the 1/2 cup sugar together.

Stir the hot milk slowly into the yolks and sugar, taking care not to create too many bubbles. Return the mixture to the pan and set it over low heat, stirring constantly with a wooden spoon. Check the back of the spoon frequently, and as soon as the custard is thick enough to coat it, remove it from the heat and pour it directly into a bowl. This will only take a few minutes. (Be careful not to let the custard come to a boil, or it will curdle.)

Pour the cooked custard through a strainer into a clean bowl, then stir in the remainder of the cream. Scrape the seeds out of the vanilla bean into the custard, put the pods back in, and set the custard in the refrigerator, with waxed paper on its surface, until it is thoroughly cooled.

Peel the peaches and slice them. Use a potato masher or large fork to break them into a very coarse puree that has plenty of small chunks of fruit. Stir the remaining 1/3 cup sugar into the fruit, and let it sit until it has dissolved, about an hour.

When the custard is well chilled, remove the vanilla pods, add the peaches, and freeze according to the instructions of your ice cream machine.


Tuesday, January 31, 2017

Have you ever used a Pressure Cooker? Here's how to braise pork shoulder quicker

Recipe: Braised pork shoulder with carrots and potatoes

Pork shoulder is a delicious cut of meat, but it requires 2 1/2 - 3 hours of cooking in a slow oven. Unless, that is, you use a pressure cooker. Then it's about 45 minutes.

Some of us grew up with Moms who used pressure cookers, and we were warned to stay far away from them. The early pressure cookers were somewhat unstable and could blow up. I'm still a little scared, but new pressure cookers are foolproof. They are heavier, the tops lock onto them more securely and the valves that relieve just enough pressure to keep things in equilibrium are eons better than they used to be.

Pressure cookers cook fast by trapping steam so food cooks hotter. This is not only faster but also means fewer nutrients are lost, less energy is used, and everything tastes better. It's a great way to cook, and not only for meat. You can cook vegetables in a pressure cooker, you can cook pasta, you can even cook desserts. It's all about the length of time you cook it. Some foods take only a matter of a few minutes.


I have a stovetop pressure cooker, in fact it's the one pictured. I really like this cooker - it's easy to use. There are also electric pressure cookers, but they seem to have trouble after only a few uses. If you are thinking of buying one, I'd recommend the stovetop type. The one I have is a 10-quart size. If I had it to do over again, I would get a smaller one. I bought my son and daughter-in-law a 6-quart size and they say it's the perfect size for them. There are also 8-quart cookers, which would be a good compromise.


I'm experimenting with mine to learn how to use it best. Here's how I made some wonderful pork shoulder in one-third the time it usually takes. It was delicious!

Quicker Braised Pork Shoulder with Carrots and Potatoes


2 lbs pork shoulder, cut in 2-inch pieces and rubbed with:
  • 2 teaspoons sea salt
  • several grinds fresh black pepper
  • 1/2 teaspoon oregano
  • 1 teaspoon ground ancho chile
1 onion, peeled and cut in chunks
1 large carrot, peeled and cut in chunks
1 large or 2 medium potatoes, cut in large chunks or whole if medium size, peeled or not as you wish
1 teaspoon oregano
1 small dried chile, seeded and crumbled
4 cloves garlic, peeled
1/2 teaspoon salt
1-1/2 cup chicken broth

Put all the peeled and cut vegetables in the pressure cooker. Add the seasonings and the meat. Pour in chicken broth.

Lock the pressure cooker according to your product directions and turn the heat under it to High. When your pressure indicator comes up, turn the indicator to High Pressure if your cooker has two pressure levels. Many have only one, and in that case it's High Pressure by default. Once the pressure comes up, turn the heat down and start timing. Cook for 45 minutes.

Turn the heat off and turn your cooker indicator to release pressure. Be sure you read your product instruction the first time or two you use it. This stuff is important! When the pressure is released and your pressure indicator is down, you can open the cooker. Dinner's ready!

This dish is gluten free and was delicious with a fresh kale salad. Buon appetito!


Thursday, September 1, 2016

Heirloom tomato chutney

Recipe: Heirloom tomato chutney


What a year for tomatoes! We have a bumper crop in our front yard in Oakland, big delicious heirlooms, and I'm on the lookout for ways to use and preserve them before their sweetness fades. Ah, the drama of tomato season! Use them quickly, or lose them!

Today I made tomato chutney using a recipe based on one from Jamie Oliver. I made a double batch, because I have so many tomatoes. It lasts four months in the refrigerator. I know we'll use this chutney before four months have passed, but it's something to think about.

I'm looking forward to eating it with meats - lamb, braised pork, and chicken. It's sweet, tart, and a bit spicy. Oh so good! Jamie says it's wonderful on a piece of good bread with cheddar - will definitely try that too. Here's how to make it, and this is the recipe for a single batch. Double it if you dare!

Heirloom (or any) tomato chutney

  • 1 medium red onion, peeled and sliced thin
  • 1 pound (or a little more) fresh tomatoes, any or various colors, stemmed and chopped rough
  • 1 fresh red chili, stemmed, seeded, and chopped fine (or a small red bell pepper if you prefer not hot)
  • 5 tablespoons red wine vinegar
  • 1/2 cup brown sugar (scant, i.e. not packed, if your tomatoes are as sweet as mine are)

In a heavy medium saucepan, combine all ingredients and add a little sea salt to taste. Mix well to combine.


Cook over medium heat for 45 minutes, or until it reduces to a fairly thick jam-like consistency.


Meanwhile, sterilize a pint jar with a lid by submerging it in boiling water for 10 minutes. Drain the jar and fill it with chutney. Cap it and refrigerate it when it is cooled. Will keep in the refrigerator for up to four months. As if you won't eat it before then! Yum.

Tuesday, February 23, 2016

Jambalaya (in honor of running in New Orleans)

Recipe: Chicken and shrimp jambalaya


I've gone with friends to New Orleans several times to run the Crescent City Classic, a 10k that usually takes place in the spring. Three things about this race stand out in my memory. First, regardless of how early in spring it was, the weather was always hot and humid, at least to this west-coaster. There was always big-time sweat almost immediately after we started running. The second thing is related to the first, and that is that people stood in their front lawns all along the race course and handed us beers over their fences, to keep us hydrated and also to make sure it was a party! Loved that! The third fond memory was at the end, when we were hot and tired and famished. Huge pots of spicy jambalaya awaited us in the park where the race ended. Those folks fed hundreds of runners jambalaya, and was it ever delicious! Every time I make jambalaya, I think of those fun times.

Jambalaya is surprisingly easy to make, given its complex tastes. It's basically a highly flavored rice dish with meat and fish, usually shellfish. I base this recipe on Paul Prudhomme's book, The Louisiana Kitchen, with the caveat that I pare down his heat quite a bit. As I've mentioned before, Paul's spicing is wonderful and way too hot for me. This adaptation uses all the wonderfulness and has a spicy kick that's manageable. This time I used chicken and shrimp, although you can also include sausage if you like. Paul includes raw shucked oysters, and you can do that too if you add them with the shrimp.

Incidentally, I previously posted a recipe for Poorman's Jambalaya, which uses a different cooking method. There are many roads to Chicago, as they say!

Chicken and Shrimp Jambalaya

Seasoning mix:

  • 1 bay leaf
  • 3/4 teaspoon salt
  • 1/4 teaspoon cayenne pepper
  • 3/4 teaspoon dried oregano
  • 1/2 teaspoon white pepper
  • 1/2 teaspoon freshly ground black pepper
  • 1/2 teaspoon dried thyme

Ingredients:

  • 1 tablespoon bacon fat (I save mine in the fridge when I cook bacon) or olive oil
  • 3/4 cup chopped onions
  • 1/2 cup chopped celery (I have also used chopped cauliflower instead of celery, yum)
  • 1 red or yellow bell pepper, chopped
  • 1 skinless boneless half chicken breast, cut in bite-sized pieces
  • 2 cloves garlic, minced
  • 1 14-oz can chopped tomatoes
  • 1/2 cup water
  • 1 cup chicken stock or seafood stock, if you have it
  • 1 cup uncooked white rice, basmati works fine
  • 1 pound or more peeled shrimp, tails on OK

Make the seasoning mix first in a small bowl. Set aside.

Turn the oven on 350 degrees.

In a medium saucepan, saute the onions, celery, and bell pepper in the fat or oil about 5 minutes, stirring occasionally. Add chicken, raise heat to high and cook 1 minutes, stirring.

Reduce heat to medium, add the seasoning mix and the garlic and cook about 3 minutes, stirring and scraping the bottom of the pan. Add tomatoes and water and cook about 15 minutes, stirring frequently.

Stir in the stock and bring it to a boil. Add the rice, shrimp (and oysters, if using) and stir to combine. Transfer the jambalaya to an ungreased 8x8 baking dish or a deep pie pan. Cover it tightly with aluminum foil and bake at 350 for 45 minutes. Rice should be tender and liquid should all be absorbed.

Remove the bay leaf and serve at once. It's delicious all by itself or with a green salad. Yum!

Wednesday, November 4, 2015

Pork and beans

Recipes: Braised pork shoulder with chiles, Baby lima beans


This post's title is a play on a childhood staple - Campbell's pork and beans, which comes in a can and was a reliable lunch or dinner when I was a kid. We all loved it - or at least we preferred it to the usual "adult" food we were offered. The "pork" was one or at the most two tiny pieces of fat, and the beans were cooked in a tomato-y sauce. It was probably laden with sugar and salt, always attractive to kids. All you had to do was heat it up.

The pork and beans we're talking about here isn't anything like that, apart from the name. Our pork is Alice Waters' version of slow-cooked pork shoulder braised with dried chiles, and the beans are baby limas cooked separately and served as a bed for the pork and its mouth-tingling sauce. Yum, yum, and double yum.

Braising is an especially good way to cook a shoulder roast, whether it be pork, or lamb, or beef. Shoulder is a muscular, sinewy roast marbled with fat that has maximum taste and tenderness when cooked right, but it must be cooked for a long time at relatively low temperature in order to achieve those heavenly qualities. I usually use a boneless roast, but if you can get a shoulder roast with bone in, the flavor will only be enhanced and the meat will fall off the bone when it is finished.

The roast can easily be done in a slow cooker. Just follow the recipe except put everything in the cooker in the morning, cover it, and turn it on Low. Forget about turning it. It'll be done and totally yummy by dinner time. The lima beans don't really need to be soaked prior to cooking, but if you feel better doing so just soak them for a couple of hours rather than overnight. Limas cook rather quickly so the fact that they don't need soaking makes them ideal for an after-work accompaniment if in fact you decide to do the roast in the slow cooker. In a pinch, you could also just warm up canned or frozen limas, although I like the results of using dried beans better.


Pork Shoulder Braised with Dried Chiles


Make a dry rub by mixing together:
  • 1/2 tablespoon salt
  • A good grind of black pepper
  • 1 teaspoon dried oregano
  • 1/2 teaspoon ground chile
Season on all sides with the rub:
  • a 2-pound pork shoulder roast  
If you can do this the day before and keep the roast, seasoned and covered with cling film, in the fridge overnight, do it. If not, just season it all over before cooking. If you have the roast in the fridge, take it out one hour before cooking.

Preheat the oven to 375 F.

Put in a heavy baking dish or roasting pan that just fits the roast (or in the pot of your slow cooker):
  • 1 onion, peeled and coarsely chopped
  • 2 carrots, peeled and cut into 1-inch pieces
  • 2 dried chiles. Anchos are good, one ancho and one dried chipotle would be good and spicy, dried chiles of any kind you like can be used. Take out the seeds and break the chiles up into pieces. This roast is also delicious with no chiles at all.
  • 8 large cloves garlic, peeled and halved
  • A few black peppercorns
  • 1/2 teaspoon dried oregano
Place the seasoned meat on top of the vegetables and pour in:
  • 1 cup chicken broth (1-1/4 cups if you are using the slow cooker rather than the oven)
The liquid should come about 1/4 of the way up the roast. Add more if necessary.

Cook, uncovered, in the oven for 1 hour and 15 minutes. Turn the roast over and cook for 30 minutes, then turn again. Cook for another 30 minutes and test the meat for doneness, continuing to turn and cook until done. In my experience, this takes about 2-1/2 hours, or 2+ turns, for a 2-pound roast. All ovens are different, and yours may take a little longer.

If you are using dried beans, you can start cooking them any time after you've put the roast into the oven.

Remove the meat from the pan and let it rest on a cutting board for 10 minutes. It should be very tender and almost falling apart. Alice Waters' recipe suggests skimming the fat off the sauce and putting the sauce and vegetables through a food mill to make a gravy for serving. I have most often just served the vegetables alongside slices/pieces of the meat with a little of the sauce to pour over. Suit yourself. It will be delish either way.

Baby Lima Beans

  • 3/4 cup of dried baby lima beans, picked through for stones and rinsed under cool water.
Normally beans call for a few savory additions, like onions, carrots, and garlic. Since these beans will be served under a savory roast, vegetables, and sauce that's really not necessary here.

If you've soaked the beans, add water to measure at least two inches above the level of the beans. Bring them to a boil, turn the heat down to low/medium low, and put a cover at an angle to partially cover the pot. Do not add salt yet, do not continue to let the beans boil. They should simmer gently...low and slow.

After 30 minutes, taste the beans. If they are not almost soft, continue to cook them low and slow. After 10 more minutes, taste them again. Always keep an eye on the liquid; the pan must not cook dry. Add a little water if necessary. You are trying to find the moment when the beans still have the tiniest bit of bite, but are almost perfectly soft. Keep tasting until you find that moment, then add 1 teaspoon sea salt and 1/4 teaspoon dried thyme. Cook a few minutes more, maybe 5 or 10 minutes, or until perfectly soft. Turn off the heat and put the cover on the pot to keep the beans warm until the roast is ready to be served.

To serve, spread the beans on a serving platter with a slotted spoon so any remaining liquid stays in the pot. Top with slices of pork surrounded by the vegetables. Pour a bit of the roasting pan juices, or the sauce/vegetable gravy, over it all. Dig in!

Buon appetito!


Wednesday, April 8, 2015

Adventure in calamari

Recipes: Sauteed calamari steak with prawns and sausage


I get into ruts just like everyone else. Suddenly I'm tired of chicken - it can seem like I've eaten chicken four times a week forever. It's time for something new! Yet, it's hard to break out of the old routines. After all, you can cook some things without really thinking. You have all of the ingredients, all the time. It's so easy. Well, now and then you just have to change things up to keep cooking interesting. You have to be adventurous! Lately I've been trying some new dishes with calamari steak - my Adventure in Calamari, if you will.

Calamari Steak with Prawns and Sausage


It used to be, in years past, that abalone was the thing everyone wanted to eat. Our friends went diving for abalones along the California coast. Abalone was tender and unbelievably delicious, and precious, it turns out, because soon they nearly disappeared. Unfortunately, they were too popular. Today, abalone is hard to come by and very expensive. Enter calamari steak, which is similar in taste and texture, and oh-so-delicious too.

Calamari steak, also known as squid steak, can be found at good meat and fish counters. It is the same sea creature, but not in the same form, as squid tubes, which are often sliced, coated in batter, and fried. You may have to ask your butcher for it - mine keeps calamari steak in the freezer as not many people know to ask for it.

The secret to cooking calamari, whether steak or tube slices, is to either cook it quickly or for a very long time. Anything in-between produces a rubbery texture, which is unpleasant. When I made it, I cooked it quickly and combined it with prawns, which also need to be sauteed quickly. It was fabulous over brown rice, which I made first and let sit covered while the fish cooked.

  • 2 tablespoons butter
  • 1 calamari steak
  • 12 medium prawns, shelled
  • Sea salt and freshly ground pepper
  • 1/4 teaspoon crushed red pepper flakes (optional)
  • 1 teaspoon sugar
  • 1 tablespoon capers
  • lemon wedges
  • two mild or hot chicken Italian sausages (delicious in this dish, but optional)
Cut the calamari steak into inch-wide strips. Set aside.

Toss the prawns with a little salt and pepper and the sugar. Set aside.

Slice the raw sausages and set aside. They are easier to slice if partially frozen.

Just a few minutes before you're ready to serve dinner, melt the butter in a medium skillet over medium high heat. Add the sausage first, and saute a few minutes until no longer raw. Add the capers, the calamari steak strips, and the prawns. Stir for a minute. Add the red pepper flakes, if using. Stir to saute all sides quickly.  Prawns and calamari should be opaque - their total cooking time should be no more than 3 minutes.

Serve over brown or white rice, or a combination with wild rice, with lemon wedges for squeezing and a salad or other vegetable.


Thursday, March 26, 2015

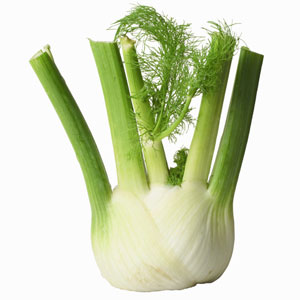
Why not try . . . fennel?

Recipes: Braised fennel and leeks, Fennel salad, Grilled fennel


Don't we love vegetables!? Yes we do, but sometimes we get just a teeny bit tired of the vegetables we love. Same old, same old. That's why it's fun to try something new.

Of course I already knew about fennel. I'd eaten it in restaurants mixed in with other things, but I'd never cooked with it. Wasn't it very licorice-y? I do like black licorice, but that's candy. Wouldn't it be too strong and maybe sweet? It just didn't seem like it would be good as a vegetable.

Oh, how wrong I was!

Braised Fennel and Leeks


  • 2 medium or 3 small leeks
  • 1 small to medium fennel bulb
  • Sea salt and freshly ground black pepper
  • 1/4 cup good chicken stock, or vegetable stock if you want to make this dish vegetarian
  • 2 tablespoons butter

Cut ends off the leeks and cut them in half lengthwise. Wash them very carefully as they often harbor sand. Then cut them in half crosswise and arrange them in a medium skillet or dish that can go both on the burner of the stove and in the oven.

Cut the stalks off the fennel bulb and cut the bulb in half lenthwise. Cut slices or wedges from the bulb halves, no thicker than the pieces of leek. Arrange the fennel in the dish with the leeks.

Turn the oven on to 350 degrees F. 

Pour the chicken stock over the vegetables and sprinkle the butter cut in pieces over it all. Add a small amount of sea salt and a good grind of pepper. Heat over medium flame until the liquid boils, then turn down the flame and cook for a minute or two while the oven finishes heating.

Turn off the flame and cover the skillet/dish loosely with aluminum foil. Place in the heated oven for about 30 minutes, or until the liquid turns syrupy and the vegetables are very tender.

Serve next to anything - meats, rice, even pasta. You'll find it has the tiniest, most delicate, hint of aniseYum!!!

Fennel and Arugula Salad


Arugula and shaved or very thinly sliced fennel bulbs are wonderful tossed with a light vinaigrette made with sea salt, a little freshly ground pepper, 2 teaspoons fresh lemon juice, and 2 tablespoons extra virgin olive oil. Variations on this theme can add to the deliciousness - sliced radishes and shaved Parmigiano-Reggiano cheese are especially good.

Grilled Fennel


Cut off the leafy tops and stem ends of fennel bulbs. Cut the bulbs in half lengthwise and cut each half into two or three equal wedges. Salt them and steam them for about 20 minutes, until the fennel is tender but still intact.

Make a small vinaigrette for brushing on the wedges before and after grilling: A few chopped fennel fronds, a tablespoon or so of extra virgin olive oil, a squeeze of lemon, and a little chopped anchovy if you wish. 

Thread the steamed wedges on long skewers and brush with the oil mixture plus season with salt and pepper. Grill over prepared coals until nicely browned, turning frequently. Brush again with oil mixture just before serving.

Tuesday, December 16, 2014

More 'tis the season for soup!: Seafood chowder

Recipe: Seafood chowder with smoked salmon and shrimp


Love the rain we're getting, but oh my, it's definitely soup season. Although it's not cold where I am compared with, for instance, winter in my original home in Minnesota, there's still a super-wet chill that seeps in through the walls and around the window frames of my 98-year-old home. Hot, luscious, nourishing soup is the answer! So warming, so comforting, so elemental. I imagine a cave thousands of years ago, a woman stirring a pot of soup over an open fire while her men-folk forage out in the cold and wet and her children, layered in fur blankets, stretch their hands toward the warming fire and dream about the good food to come. That's soup.

Believe it or not, I first got this recipe from a vegetarian cookbook, one of the early Recipes from Moosewood Restaurant. Some otherwise "vegetarians" include seafood in their diets, and I guess that's why this and a few other fish recipes were included. It's really easy and is versatile in that you can include various kind of fish and shellfish, and even various vegetables. Here's the version I usually make.

Seafood Chowder with Smoked Salmon and Shrimp


  • 2 tablespoons butter
  • 1/2 cup chopped onions
  • 1 garlic clove, minced
  • 2 medium carrots, peeled and chopped
  • 1 stalk celery, chopped
  • 2 medium red or yellow potatoes, cubed
  • 1 red or orange bell pepper, seeded and chopped
  • 2 cups chicken stock, or vegetable stock
  • 1 bay leaf
  • 1/2 teaspoon dried dill weed
  • 1/2 teaspoon dried marjoram
  • Sea salt and freshly ground black pepper to taste
  • 4 ounces smoked salmon, roughly chopped*
  • 8 or 10 medium-to-large raw shrimp*
  • 1/2 cup whole milk or half-and-half
  • Chopped fresh parsley
  • Lemon wedges

*Fresh salmon or any kind of white fish can be used, cut in bite-sized pieces, instead of the smoked salmon and shrimp. Be sure to remove any small bones.

In a small stockpot or medium Dutch oven, saute the onions and garlic in the butter until the onions are translucent. Add the carrots, celery, and potatoes and saute gently for 5 minutes.

Add the bell pepper, stock, and herbs and simmer until the vegetables are tender, about 15 minutes.

Add salt, pepper, and the salmon and shrimp and simmer 3 to 5 minutes, until the shrimp are just barely cooked.

Warm the milk slightly, in the microwave or on the stove, then stir it into the chowder. Serve garnished with parsley and lemon wedges to squeeze over.

Buon appetito!

This recipe is gluten-free.


Thursday, November 20, 2014

Mac 'n cheese update (improving on a classic)


Recipe: Cauliflower mac 'n cheese


Everybody loves mac 'n cheese. I've made the same recipe for years, with a white sauce to which you add cheese and finally the cooked macaroni. It's not hard but it does take a little time and effort to make. Recently, I looked online for a recipe because I couldn't find my old recipe - it was in a magazine and I was too lazy to look for it. See what the Internet does to us! Anyway, I found this recipe that originally came from Jamie Oliver. It's so much easier and truly delicious - I think even better than my original.

Here's a version with cauliflower, which adds tons to the taste even though it's already good. And it's a great way to get your veggies while pigging out on pasta. You have to try this!

Cauliflower Mac 'n Cheese

  • 1/2 head of cauliflower, cut in small florets and stems sliced
  • 10 ounces dried macaroni
  • 6 ounces of sharp or extra sharp cheddar cheese, grated
  • 4 ounces grated Parmesan plus a couple tablespoons for sprinkling before baking
  • 2 tablespoons chopped flat-leaf parsley
  • Sea salt and freshly ground pepper
  • 1/2 cup sour cream (I use light sour cream)
  • A pinch of ground cumin
  • A pinch of cayenne

Heat the oven to 375 degrees.

Bring a large pot of water to a boil. Add 1 1/2 tablespoons salt. Add the macaroni and the cauliflower florets and sliced stems, and cook until the macaroni is nearly done, about 6 minutes.

In a small heavy saucepan, put the cheeses and sour cream over very low heat to melt. Or, alternatively, set a heat-proof bowl in a steamer over the cooking macaroni and cauliflower and put the cheeses and sour cream in it. Either way, when the cheeses start to  melt, stir them until they are smooth. If you have set a bowl over the macaroni water, remove it carefully - it will be hot. Add salt, pepper, cumin, and cayenne to the cheeses.

Taste the macaroni when it has cooked 6 minutes - it should be the tiniest bit hard yet. Scoop 1/2 cup of the pasta water out and set it aside. Then drain the macaroni and cauliflower in colander and  return it to the pot. Add the melted cheese mixture to the macaroni and cauliflower and stir well. Add the reserved pasta water and the parsley and stir again to combine.

Pour the mac 'n cheese into a baking dish. Sprinkle with a couple tablespoons of grated Parmesan. I also like to sprinkle a little more cayenne on the top (cause I like it spicy!). Put it in the oven for about 20 minutes, or until it's golden and bubbling.

Serve with a kale or baby greens salad. Yum!

Buon appetito!

This recipe for mac 'n cheese is vegetarian and can be gluten-free, if made with gluten-free macaroni, like quinoa and brown rice macaroni.

Wednesday, October 15, 2014

Ribs and potato salad (summer's last dance)

Recipes: Oven roasted BBQ ribs, Potato salad


A soul food treasure, BBQ ribs and potato salad are also a natural combination of tastes. At the end of summer, why not splurge on one last on-the-patio dinner? These ribs can be made all winter long, though, because they don't rely on an outdoor barbeque. They're done in the oven, slow and low. They. Are. The. Best. Ribs. Ever.

I've posted these recipes before, but they were buried along with other party recipes. Here they are in their full glory - a fabulous soulful dinner for the two of you.

Oven Roasted BBQ Ribs

  • 2-3 pound of pork ribs or babyback ribs

For the Rub:
  • 1/2 cup dark brown sugar
  • 3/4 teaspoon smoked salt (alderwood or cherrywood). You can get smoked salt at a spice shop or online)
  • 1 tablespoon sweet Hungarian paprika
  • 3/4 tablespoon garlic granules (not garlic salt)
  • 1/2 teaspoon ground red New Mexico pepper

Plus, for the finale
  • 1 1/2 cups BBQ sauce, make your own (recipe here), or your favorite bottled.
Preheat the oven to 300 degrees F.

Mix together the ingredients for the rub. Peel off tough membrane that covers the bony side of the ribs by inserting a dinner knife or spoon under it and working it off with your fingertips. (This isn't necessary with babyback ribs.) Apply the rub to all surfaces of the ribs.

Cover a baking sheet with two layers of aluminum foil, shiny side out. lay the ribs on the foil meaty side down. Cover the ribs with two more layers of foil and crimp the edges tightly.

Roast for 2 to 2-1/2 hours, or until the meat starts to shrink away from the bones. Remove the ribs from the oven.

Heat the broiler to High.

Remove the top layers of foil. Cut the ribs into serving pieces (2 or 3 ribs per piece). Arrange them, bony side up, on the foil covered baking sheet and brush them with BBQ sauce. Slide under the broiler and broil for 2 minutes, or until the ribs darken a bit.

Turn the ribs over, brush on BBQ sauce, and repeat on the other side.

While the ribs are roasting, make the potato salad so that it can chill in the fridge for at least one hour.

Potato Salad


This potato salad recipe came from my friend Donna in Clearwater, Florida, and it is by far the best I've ever tasted.

  • 4 medium red potatoes, cut in quarters and boiled or steamed until soft.
  • 1 tablespoon white vinegar
  • 1/2 tablespoon sugar
  • 3 hard-boiled eggs, sliced or diced
  • 1/2 small onion, diced
  • Mayonnaise to taste, about 3 tablespoons
  • 1/2 tablespoon brown or Dijon mustard
  • 3/4 teaspoon celery salt
  • Freshly ground black pepper

Let potatoes and eggs cool. Leave skin on red potatoes and cut them into bit-size pieces and put them in a medium sized serving bowl.

Sprinkle the potatoes with vinegar, then sugar. Stir.

Add chopped eggs and onions.

Add mayonnaise, mustard, celery salt, and ground pepper to taste.

Mix together, then put in the fridge to cool and blend the flavors. Yum!

Buon appetito! It's gonna be good!!