Showing posts with label gluten free cooking. Show all posts

Tuesday, August 29, 2017

Tomatoes

Recipes: Marinara tomato sauce, Polenta with cheese and tomatoes


This time of year, we're always inundated with gorgeous homegrown heirloom tomatoes.
Brandywine heirloom tomato

That's a good thing, of course. Except that they all come ripe at once and it's a race to eat them, cook them, use them all before they spoil. We have five big tomato plants and they've all produced like champs. I've been cooking sauce all week.

Last night was the fifth big pot of sauce I've made in the last four days. To say I'm tired of cooking tomatoes would be an understatement. However, I'm not yet tired of eating tomatoes and the sad thing is . . . suddenly they will be gone. And there won't be any gorgeous homegrown delicious tomatoes until this time next year. I'm not complaining.

Most of the sauce I've made I've frozen in quart freezer baggies, to use when I have no tomatoes. This year's crop is super sweet, and even though canned tomatoes beat tasteless supermarket tomatoes by a mile in winter, there is no option that will come even close to what I have in the freezer. We'll get to enjoy the bounty later, which brings me joy.

Half the sauce I made last night went into a terrific polenta dish I learned to make from an old Greens cookbook. Greens is a wonderful vegetarian restaurant in San Francisco, one of the first really gourmet vegetarian restaurants, and is still going strong. Here's the method for both the sauce, just enough for the polenta this time, and the polenta with cheese.

Marinara (Tomato) Sauce 


  • 5 good-sized ripe fresh tomatoes, peeled and chopped, with their juices. Best way to peel tomatoes: Cut out the stem/core at the top, slip the tomatoes into boiling water to cover for 5 seconds, pull them out with a slotted spoon. Once cooled enough to handle, the skins slip right off.
  • 3 tablespoons extra virgin olive oil
  • 1 clove garlic, sliced thin
  • 1 teaspoon dried oregano
  • 1/2 teaspoon sea salt
  • A sprinkle of crushed red pepper
  • 1 tablespoon tomato paste (optional)
  • 1/4 cup dry white wine


In a large skillet, heat the olive oil. Turn off the heat and put the sliced garlic in. Stir a bit and let cool down slightly so the tomatoes don't spatter. Put the tomatoes in. Turn the heat back up to medium low. Add the herbs and seasonings and stir.

Add tomato paste if you have it. I keep a baggie of tomato paste in the freezer and use it to thicken the sauce, but it will be fine without it.

Simmer the sauce over low heat for about an hour, stirring now and then to keep it from sticking. You will see when it cooks down and starts to become thick. When it gets quite thick and the pieces of tomato have broken down, add the wine. Stir well and cook for another 15 minutes.

Polenta with Cheese and Tomatoes


You will need:

  • 5 ounces Danish fontina cheese
  • 1 ounce Gorgonzola cheese

For the polenta:

  • 1 cup medium ground polenta
  • 3 cups water
  • 1/2 teaspoon sea salt
Bring the water to a boil in a medium saucepan. Add salt. Whisking all the while, slowly add the polenta. Cook over medium heat, whisking, for 15 minutes.

Pour the cooked polenta into an 8" x 8" pan and let cool. This is a good thing to do while the tomato sauce is cooking, as it takes about an hour for the polenta to cool completely.


To assemble the dish:


Preheat oven to 400 degrees F. Lightly butter a gratin dish.

Put 1/2 cup of the tomato sauce into the prepared gratin dish.

Cut the cooled polenta into rectangles. Place a rectangle of polenta into the gratin dish, then put a matching slice of fontina cheese next to it. Place another rectangle of polenta next to the cheese and continue layering until the gratin dish is full. You can push the rectangles together a bit to get some more in.

Decoratively drizzle a few thick stripes of tomato sauce over the top of the rectangles. Crumble the gorgonzola cheese over it all and give it a good grind of fresh black pepper.

Bake in the oven for 30 to 35 minutes. When it's done, you can top it with some chopped fresh basil if you have it. I served mine with a kale salad, any salad or simple vegetable would go well with this dish. Buon appetito!

Wednesday, May 24, 2017

Stir Fry!

Recipes: Chicken with broccoli, Perfect white rice, Dry-fried green beans


When I told my friend Yvette, who was raised in Beijing, that I was experimenting with stir fry dishes, she rolled her eyes. "What?!" I said. "That's like saying I'm experimenting with saute," she said. "There are no such thing as stir fry dishes in Chinese. It's just the way we cook."

OK, I guess it's how we, as Westerners, talk about something that seems special because it's not the way we commonly cook. And it tastes good and is undoubtedly healthy. I wanted to learn more, so I wouldn't always have to find a recipe and follow it. I wanted to understand the spicing and the sauces and the sequence of cooking well enough to be able to create dishes on my own. I'm still experimenting and here's what I've found so far. I have to admit there have been some successes and a few failures!

Chicken with Broccoli


One of the first things I read, and realized to be true, is that our Western stoves are not made for woks. Chinese stoves have a large recess to accommodate the rounded bottom of the wok, with gas jets underneath. Our burners are flat, whether they're gas or electric, so they don't heat the wok the way Chinese stoves do even when you use the common rounded base to set the wok in. We have better success with a heavy flat-bottom skillet, like a cast iron one. As a result, even though I own two woks, I have used a skillet for each of these dishes with good success.

Chinese cooking is all about preparation. Prepare and measure out all the ingredients in advance, and the cooking will be easy!

Here's what you need:
  • 2 small or 1 large half chicken breast, cut in medium sized cubes
  • 3 scallions, whites only, thinly sliced
  • 2 cloves garlic, minced
  • 1-inch piece fresh ginger, peeled and minced (peel with a vegetable peeler or by scraping with a teaspoon)
  • 1 tablespoon soy sauce
  • 2 tablespoons sugar
  • 1 tablespoon, plus 1 separate teaspoon cornstarch
  • 1 1/4 teasoons sea salt
  • 1 tablespoon dry sherry
  • 1 tablespoon dark sesame oil
  • 4 or 5 cups raw broccoli, or a combo of broccoli and cauliflower, stalks trimmed and sliced and flowerettes cut into medium small pieces (keep stalks and flowerettes separate)
  • 3 tablespoons vegetable oil (peanut oil or Wesson oil)
  • 1/3 cup water
  • 1/2 teaspoon red chili flakes
  • 1 tablespoon hoisin sauce
Put scallions, half the garlic and ginger, the soy sauce, sugar, 1 teaspoon of the cornstarch, 1 teaspoon of the salt, the sherry, and the sesame oil in a medium bowl.  Add the cubed chicken and mix well with your hands. Cover with plastic wrap and marinate at room temp for at least 15 minutes.

Mix the remaining tablespoon cornstarch with the 1/3 cup water and set aside.

Heat a large skillet over high heat. Add 1 tablespoon of the vegetable oil and heat. Add the broccoli stems and fry, stirring, for 30 seconds. Add the flowerettes and the remaining garlic, ginger, 2 tablespoons of water, 1/4 teaspoon salt, and freshly ground pepper to taste. Stir fry until the broccoli (and cauliflower, if using) is tender but still crisp, about 2 minutes. Test with the tip of a paring knife. Transfer vegetables to a plate.

Get the skillet hot again and then heat 2 more tablespoons oil. Add the chicken and chili flakes. Stir fry until the chicken loses it raw color and gets a little brown, about 3 minutes. Do not overcook chicken. Add the hoisin sauce, and a little more is better than a little less. Return the vegetables to the pan and toss well to combine and re-heat. Stir in the reserved cornstarch mixture and bring it to a boil to thicken.

Serve over rice. Can be garnished with toasted sesame seeds if you wish.

Perfect White Rice


I often use basmati rice, but jasmine is also delicious and works the same way.

In a medium to small pot, combine 1 cup raw white rice (not converted or pre-cooked) and  1-1/2 cups water. Turn the heat to high.

When the water is boiling and you see small holes forming in the surface of the rice, cover the pot and turn the heat down as low as you can. Cook for 12 minutes.

Turn off the heat and leave the pot covered. Let it sit, covered, at least 10 minutes.

Dry-fried Green Beans

This photo shows a meal I made around dry-fried green beans: The beans, plus grilled sausages over sauerkraut, and salted potatoes (saltzkartoffeln). It was a multi-cultural meal and a delicious combination!

Here's what you'll need for the beans:

  • 1/2 lb. green beans (or Chinese long beans)
  • 1/2 tablespoon garlic, chopped
  • 1/2 tablespoon fresh ginger, chopped
  • 1 scallion, white part only, finely chopped
  • 1/4 teaspoon red chili paste
  • 1/2 tablespoon dark soy sauce
  • 1/4 teaspoon sugar
  • sprinkle of sea salt, to taste
  • grind of black pepper, to taste
  • 1-1/2 tablespoon peanut or vegetable oil
Wash the green beans, drain and trip tops and bottoms. Cut on the diagonal into 2-inch slices.

Chop the garlic, ginger, and scallions.

Heat 1 tablespoon oil in a heavy skillet over medium heat. Add the green beans and stir fry until they start to shrivel and turn brown (6-7 minutes). Remove the beans from the skillet and drain in a colander.

Heat 1/2 tablespoon oil in the skillet on high heat. Add garlic, ginger, and scallions. Stir fry for a few seconds, then add the chili paste and stir fry for a few more seconds until aromatic.

Add the green beans and the soy sauce, sugar, salt, and pepper. Stir everything together.  Serve hot.

Not sure what the Chinese expression for buon appetito is, but I hope these goodies whet your appetite and encourage you to experiment too!


Thursday, October 27, 2016

Creamy cauliflower soup

Recipes: Creamy cauliflower soup


This recipe gives a shout-out to Ree Drummond, who cooks and writes under the blog name The Pioneer Woman. I took her recipe, which was great, and tweaked it a bit for my tastes and for the appetites of two for dinner. It's also a nod to Autumn, and Winter which is just around the corner. Some of the things I love about Autumn and Winter, aside from warm fires and cozy sweaters, are the vegetables that grow best during this time in my climate - the cabbages, the chard, the cauliflowers, the kale. Mmmmm.

On a recent chilly evening, this soup paired beautifully with a roasted beet and butter lettuce salad.

Creamy Cauliflower Soup


  • A small cauliflower, or half a large one
  • 1 or 2 carrots, peeled and chopped medium
  • 1 medium yellow onion, chopped
  • 1 stalk celery, chopped (optional)*
  • 1 small red or yellow bell pepper, stemmed and chopped (optional)*
  • 1 1/2 cups chicken broth
  • 3/4 cup whole milk
  • 1/4 cup half and half
  • 1 tablespoon butter, plus 2 tablespoons butter
  • 2 tablespoons flour (gluten free flour also works well)
  • Salt
  • Grated nutmeg
  • 1/8 teaspoon cayenne pepper
  • 1/4 teaspoon curry powder
  • Sour cream (or light sour cream) for serving
  • Fresh parsley, chopped, for serving

*I didn't have celery so I used a red bell pepper instead. I'd use one or the other, or both if you have them.

Cut the cauliflower in half and then half again, and cut the core out. Then roughly chop the cauliflower into 1 or 2-inch pieces. Melt one tablespoon butter in a medium heavy Dutch oven and add the chopped onion, carrots, celery, and/or bell pepper. Saute for 3 or 4 minutes.

Add the chopped cauliflower and saute over medium heat until the vegetables all begin to get soft, about 10 minutes. Add the broth and bring it to a boil. Simmer for 10 more minutes.

Meanwhile, melt 2 tablespoons butter in a small heavy saucepan. Whisk in the flour and cook over medium low heat, whisking, until the flour just barely begins to get tan, 2 or 3 minutes. Whisk in the milk a little at a time. You will see it gets very thick at first, but it will thin out as you keep whisking and adding milk until it has all been added. Then add the half and half. Whisk occasionally over medium heat until it gets a little thicker, about 8 minutes. This is called "making a white sauce", but don't let it scare you. It's just as easy as it sounds.

Add a tiny bit of nutmeg and the curry powder and cayenne to the white sauce. Then stir the white sauce into the soup and simmer it for a few minutes. Add salt to taste and pepper if you think it's needed.

Serve this delicious soup in bowls topped with a spoonful of sour cream and a sprinkling of fresh parsley. Yum!

Saturday, September 17, 2016

Beans and fresh tomatoes

Recipes: Fresh tomato sauce, Beans in fresh tomato sauce


Here's another delicious way to use an abundance of fresh, beautiful heirloom tomatoes, Yesterday I found myself faced with a growing pile of ripe ones, and a few nearly over-ripe, with more about to come in from the front yard. What a huge harvest, and what a shame it would be to let even a few go to waste! First thing in the morning, I separated out the fruit that needed to be used right away - red, red-green, orange, yellow - and put together a simple sauce that would simmer over a low burner until it thickened.


Fresh Tomato Sauce 


Choose a medium to large Dutch oven with a cover. Turn the heat on under it at medium and add 1/4 cup extra virgin olive oil. When the oil is hot, but not smoking, add two cloves of garlic, sliced, and turn off the burner. Let it sit to cool down while you chop the tomatoes.

Chop a lot of tomatoes into roughly one-inch pieces. I used about fifteen large tomatoes. Put all the chopped tomatoes into the pot and turn the heat to medium. Add 1 teaspoon sea salt and 1 teaspoon dried oregano (or 1 tablespoon chopped fresh oregano). If you like, chop up one small moderately hot pepper - I used a red padron - and add it to the pot. Stir everything well. Once it starts to simmer, turn the heat down to low and set the cover on askew. Let it simmer for at least one hour (I simmered mine for two hours *see note), stirring all the way to the bottom now and then.

Note: My tomatoes are particularly juicy, so there's a lot of liquid when I chop and cook them. The goal in simmering the sauce for a long time is to concentrate the liquid so the sauce thickens and has a very deep and complex tomato flavor. If your tomatoes don't produce a lot of juice, you should cook them about one hour before proceeding with the next step. It took two hours for mine to begin to thicken.

When the sauce starts to thicken, add 1/4 cup dry white wine, like a Sauvignon Blanc. Stir it in and simmer uncovered for a few minutes while the alcohol burns off. Then partially cover the pot again and simmer for another 30 minutes to one hour, or whenever the sauce reached the consistency you want.

This sauce can be successfully frozen in freezer bags or a freezer container for about two months. Or, you can use some of it right away and freeze the rest, which is what I did. It makes a delicious sauce for pasta too!

So then I had this sauce, which I let sit covered and cooling on the stove until I decided what to make for dinner. The smell was gorgeous! A couple of hours before dinner, beans with tomato sauce came to mind. Lucky thought!

Beans with Fresh Tomato Sauce


Here are a few things I've learned about dried beans:

  • Buy the freshest you can get. It seems funny to think of dried beans being fresh, but there's a world of difference between a bean that's been sitting on a shelf for years and one that was grown and dried recently. Old beans take much longer to cook. Sometimes they never get tender. Fresh beans have a more delicious flavor and they're easier to digest. While some supermarket beans are fine, you never really know how long they've been around. I buy most of my dried beans from Rancho Gordo. Here's their website http://www.ranchogordo.com/  They also have a store in the Ferry Building in San Francisco, if you're in the neighborhood. Here's what one of their packages looks like - gotta love the label!
  • You don't have to soak dried beans. If you soak, you must pour off the soaking water and you lose some valuable nutrition. It works just fine to rinse off the dried beans and then cover them by about two inches with fresh water. Simmer until they're tender.
  • Some beans cook faster than others. Lima beans, which I used for this recipe, cook in about an hour or a little more. So do black-eyed peas. Other beans take maybe an hour and a half or two hours, IF they are fresh dried beans.
  • Never add salt to beans until they are almost done. Salt keeps them from getting tender.
  • Add some leftover bacon drippings or a little lard to the beans while you cook them. I save my bacon drippings every time I make bacon (BLTs this time of year!) and keep them in a covered jar in the fridge.
  • It's worth it to grow an epizote bush outside your kitchen door - in a pot or in the ground. Epizote is a plant that grows wild in Mexico and is easy to grow here in northern California. It is perennial and comes back every spring. Many bean-eating cultures put a big sprig of epizote in their beans while cooking, and they say it helps with digestion. In my opinion, it's true.
Ingredients for the beans:
  • 1/2 pound dried beans (I used large Lima beans)
  • bacon drippings, if you have it
  • epizote, if you have it
  • the fresh tomato sauce you just made (yum!)
  • cut up sausage, like chorizo, optional
  • sea salt (add last)
In a medium large Dutch oven with a cover, put 1/2 pound rinsed dried Lima beans and cover them with water so that the water is about 2 inches above the beans. Turn the heat on medium and bring the water to a boil. Add a tablespoon of bacon drippings and a big sprig of epizote. Turn the heat down to low and let simmer, covered but with the cover ajar, for 30 minutes.

Add a half cup of the fresh tomato sauce to the beans, and a half cup of cut up sausage, if you wish. The beans will be equally delicious without sausage. Stir to combine. Continue to simmer until the beans are almost tender (you have to taste them at this point). While the beans are simmering, watch the liquid, and add a little more water if the beans absorb it all. There should be 'gravy' with the beans at the end.

When the beans are almost tender, add 1/2 teaspoon sea salt, stir, and continue cooking until beans are very tender. Serve in bowls with a little topping of fresh chopped tomato if you have tons, like I do.

Buon appetito!

Monday, April 25, 2016

Beginnings: Appetizers to tantalize your tastebuds

Recipes: Smoked trout spread, Curried fried garbanzos


I have always struggled with appetizers, much preferring to concentrate on the main meal. My friend Jackie, who dines with me nearly every Monday evening, has changed my mind on this subject, little by little. Jackie and her partner have appetizers before dinner regularly. And they're not an afterthought, or a last-minute thing. They are planned, often with one person creating the appetizer and the other the dinner. Their appetizers are fully as creative as the main meal, which I admire.

In the spirit of inspiration, Jackie brought me their recipe for smoked trout spread, which is easily made in a few minutes. This is an adaptation of that recipe, delicious when I made it the other night and served it with crackers. A memorable beginning.

Smoked Trout Spread


  • 2 ounces smoked trout
  • 2 tablespoons sour cream (I used light sour cream)
  • 1 1/2 tablespoons mayonnaise
  • 1 tablespoon chopped red onion
  • 1 tablespoon shredded carrot (optional, in my opinion. Good both with and without it.)
Remove and discard any skin from the smoked fish. Finely chop the fish. Place chopped fish, sour cream, and mayo in a small bowl and mash with a fork. Stir in chopped onion and carrot, if using.

Curried Fried Garbanzos


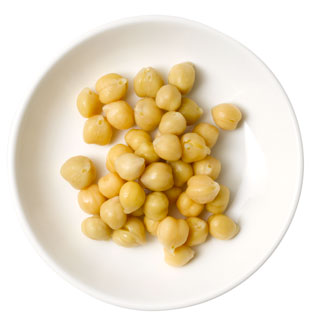
I love garbanzo beans and often use them in salads and in stews. They're very healthy eating too, full of protein and fiber. This is so easy, and everyone seems to love curried garbanzos.


  • 1 14-oz can garbanzo beans, rinsed and drained
  • 1/2 teaspoon curry powder
  • Sea salt
  • 1 tablespoon extra virgin olive oil


Heat the oil in a small skillet. Add the drained garbanzo beans, the curry powder, and a dash of salt. Stir to coat. Fry the beans for 3 minutes, stirring occasionally.


Serve on an appetizer plate with a small serving spoon.

Saturday, March 19, 2016

Sweet endings: Poached pears

Recipe: Poached pears


I don't often make desserts. I would honestly rather have an extra helping of potatoes or pasta than use up all those calories on something sweet. However, I had invited a few of my neighbors over for a celebration of Spring dinner, and thought some of them might enjoy a dessert. This lovely and easy recipe from a 1970s cookbook I still use came to mind as a great finish for the meal, which would include braised lamb. Mmmmm, poached pears. Beautiful, aren't they? And so deliciously silky served with a scoop of ice cream on the side.

Poached Pears

Fortunately, you don't have to search out perfect pears for this dessert. In fact, underripe pears, which most pears are when they are picked, hold together better than ripe pears. Use Bosc, D'anjou, or Bartlett pears - they will all work.

Poached pears are quick to make, but need to chill for several hours. I made them the night before and left them in the fridge until dinner the next day.

For two. Double the ingredients and buy one pear per person to serve more lucky people.

  • 2 pears, slightly underripe
  • 2 cups water
  • 1 cup sugar
  • 2 teaspoons fresh lemon juice
  • 1/2 teaspoon grated lemon rind
  • 1 cinnamon stick
  • 2 whole cloves

With a vegetable peeler, peel the pears, leaving the stems on. Drop the peeled pears into a bowl of cold water with a little lemon juice in it until you are ready to cook them. This keeps them from darkening.

In a deep pot that's just large enough to hold both pears comfortably, bring the water, sugar, lemon juice, and lemon rind to a boil. Add the cinnamon stick, cloves, and the pears. Cover the pot and keep it at a rolling boil so the pears keep moving a bit as they cook. Cook until the pears are tender (test with the tip of a paring knife), which should be about 25 minutes.

Take the pears carefully out of the syrup with a large spoon and stand them up in a dish with sides. If you have to cut a small slice off the bottom to make them stand, do so. They are very soft and will flatten if they lie down. Pour a little of the syrup over the pears and chill them, covered with plastic wrap, for several hours or overnight.

Serve in small bowls with a little of the syrup and a scoop of good ice cream. I served it with salted caramel ice cream and it was scrumptious. Buon appetito!

Thursday, March 3, 2016

Red cabbage: A vegetable side that acts like the main attraction

Recipe: Braised red cabbage


Not just a pretty face, red cabbage tastes fabulous cooked this way and it's wonderfully good for you! Simple to make, it can be vegetarian or not, it's gluten free, and it can stand alone on a night when you feel like a simple dinner that satisfies. Or it can be part of something bigger. Wouldn't you love to eat some tonight? Here's how to do it.

Braised Red Cabbage


In a medium Dutch oven, saute two slices of bacon, cut up. When the bacon pieces are nearly crisp, remove them to drain on a paper towel. Leave the bacon fat in the pot. If you want your dish to be vegetarian, skip the bacon and substitute 1 tablespoon good olive oil.

Core and cut a medium head of red cabbage into bite-sized pieces or coleslaw-like strips. Put all in the pot. Add:
  • 1/2 large onion sliced medium thick
  • 4 tablespoons butter cut in chunks
  • 1-1/4 cup chicken stock
  • 1/3 cup red wine (something like zinfandel or cabernet)
  • 2 tablespoons red wine vinegar
  • salt and pepper to taste
Add the cooked bacon pieces if using and combine gently with a wooden spoon.

Turn your oven on to 375 degrees F. Bring the pot to a boil on top of the stove, then turn the heat down and simmer for 20 minutes uncovered while the oven heats up. Cover the pot and put it into the oven for one hour.

Braised red cabbage is delicious by itself, or with sausage or any kind of meat. It would be wonderful with roasted new potatoes. It would be good with a little goat cheese sprinkled over it. Use your imagination. Buon appetito! 


Tuesday, September 29, 2015

Having it your way with Brussels sprouts

Recipes: Quinoa (or brown rice) with Brussels sprouts


Everyone knows Brussels sprouts are good for you. But does everyone run right out looking for Brussels sprouts? No. Some otherwise very smart people even think they don't like them. 

I happen to love Brussels sprouts, but I've also found a few really good ways to make them for people who are not so sure. Here's one you can make for any sprouts-naysayer with confidence and love. And think of all the good nutrition you're serving up! What a fabulous person you are!


Quinoa with Brussels Sprouts (brown rice variation follows)


I chose quinoa because it too is super-nutritious and very easy to make.

  • Brussels sprouts, sliced moderately thin
  • 1/2 medium onion, chopped
  • 1 tablespoon butter
  • 1 tablespoon olive oil
  • 1 cup quinoa
  • 2 cups water

Note: Slicing the Brussels sprouts is the secret, making them disappear into the sauce and become milder in taste.
In a medium saucepan or Dutch oven, melt butter and add olive oil to heat. Add the onion and saute a few minutes over medium heat until soft. Add sliced Brussels sprouts and cook for 5 or 6 minutes, until they are soft too.

Add quinoa to the vegetables and cook, stirring, for one minute to toast the quinoa a bit. Add the water and bring it to a boil over high heat. Turn the heat down to simmer, cover the pot, and let cook until the water is absorbed, about 15 minutes.

Let it sit, covered with the heat off, for 10 more minutes. Serve with any meat or fish, or on its own with a salad.


Brown Rice variation


Make exactly the same as the quinoa version, except use brown rice and, if you prefer, substitute chicken stock for water. Either way, heat the stock or water before adding it to the rice, and cook for 40 minutes instead of 15. 

Buon appetito!!


Thursday, July 30, 2015

Caesar salads and hot summer nights

Recipes: Caesar dressing, Standard Caesar salad, Caesar salad with sage chicken, Caesar salad with deviled eggs 


Hail Caesar! For those of us who love Caesar salad (love is an understatement), the search for the perfect dressing, the perfect Caesar, is never-ending. Years ago I found an old-school Italian restaurant in San Francisco that made Caesar table-side to perfection, rendering the need to continue the search for a recipe redundant. The garlic! The anchovies! Heaven! Alas, the restaurant closed. 

Ever since that sad day, I've compared every Caesar I've ever tasted  to theirs, and found it wanting. I will still try anyone's Caesar in the hope of finding perfection again, but I've been consistently disappointed. Until recently, that is, when I decided to try the recipe in one of my favorite cookbooks, America's Test Kitchen. I was in for a big and happy surprise.

First, no eggs. I am not a fan of the idea of no-egg Caesar, believing all the brou-ha-ha about raw eggs to be overstated, in particular if you are reasonably careful to buy organic eggs produced in your immediate area. Despite my philosophical leanings, this recipe uses buttermilk instead of eggs, with the advantage that you can keep it for several days in the fridge and have Caesar salads all week. On top of that, it's easy and delicious - as good a Caesar as I've had in the dark years since my favorite restaurant closed.

Caesar Dressing

In a blender, combine:
  • 1/3 cup grated Parmiggiano-Reggiano cheese
  • 1/4 cup buttermilk
  • 3 tablespoons fresh lemon juice
  • 6 anchovy fillets, rinsed and patted dry if packed in salt
  • 2 teaspoons Worchestershire sauce
  • 2 teaspoons Dijon mustard
  • 2 large garlic cloves, minced
  • 1/2 teaspoon salt
  • 1/2 teaspoon black pepper

Blend on high speed until smooth, about 30 seconds. Then, with the blender running, add in a steady stream:
  • 1/2 cup extra virgin olive oil
Regarding the cheese: This salad and dressing is about the cheese in a major way, so be sure to use freshly grated good quality Parmesan: Parmigiano-Reggiano if possible. If you truly prefer not to grate a lot of cheese, then use good quality already-grated Parmesan in the dressing and reserve your grating efforts for the salad itself, adding the freshly grated cheese when you toss the Romaine with the dressing.

This dressing can be stored, covered, in the refrigerator for up to one week.

Standard Caesar Salad

Toss 1/3 cup of the dressing with one head of Romaine lettuce, preferably cut crosswise in strips. Toss additional freshly grated Parmigiano-Reggiano cheese with the lettuce and dressing. Top with croutons, or garlic croutons, if desired. 
Croutons are easy to make. Just fry cubes of good bread on all sides in a combination of butter and olive oil, adding some garlic granules if you like.


Caesar Salad with Sage Chicken (pictured above)


For the chicken:
Marinate 2 boneless, skinless, half chicken breasts in 3 tablespoons olive oil, 3 tablespoons fresh lemon juice, and 12 fresh sage leaves for 30 minutes, turning once or twice while marinating.

In a cast iron or other heavy skillet, melt 1 tablespoon butter over medium high heat. Add the chicken breasts, marinade drained and saved, smooth side down and cook for 5 minutes. While this side is cooking, salt and pepper the side of the chicken that's facing up and arrange the sage leaves on top of that side.

Turn the chicken so that the leaves are all on the bottom and cook for 5 minutes. Salt and pepper the top side of the chicken. When the chicken is done, transfer it to a cutting board to rest, arranging the fried sage leaves on top of the breasts. Let the chicken rest for 10 minutes.

Slice the chicken crosswise and arrange the slices on top of an already prepared Caesar salad. Garnish with tomato wedges, if desired.

Caesar Salad with Deviled Eggs


For the deviled eggs:
In a small saucepan, bring 3 eggs in cold water to cover to a boil and boil for one minute. Turn off the heat, cover the pan tightly, and let it sit for 12 minutes. Then drain the eggs, rinse them in cold water, and let them cool off for at least 15 minutes.

When cool, peel the eggs and cut them in half lengthwise. Remove the yolks with a teaspoon and put them into a small mixing bowl. Add 1 tablespoon mayonnaise, 1 teaspoon Dijon mustard, and 1 teaspoon capers to the yolks, plus salt and pepper to taste. Mash the yolks and flavorings all together. Then, with a teaspoon, mound the yolk mixture back into the egg halves and arrange them around an already prepared Caesar salad. Sprinkle the eggs lightly with sweet or hot paprika.

Add tomato wedges, or perhaps lightly broiled asparagus, if desired. Yum!

A perfect dinner for a hot summer's night.


Wednesday, May 13, 2015

Yasmin's Moroccan fish

Recipes: Moroccan-spiced fish with vegetables, Roasted asparagus


 Our friend Yasmin has been visiting, and when she's here we often have a cook-a-thon and of course a resulting eat-a-thon. Yasmin, who is originally from Israel, cooks Middle Eastern style and I love her spicing. She says there were many Moroccan families in her neighborhood near Jerusalem, and she learned to make this dish from them. It's an original one-pot meal, with vegetables, potatoes, beans, and fish all cooked together in a delicious sauce that can be as spicy, or not, as you wish.

We served Moroccan fish with a simple dish of roasted asparagus with balsamica and Parmigiano cheese, plus chunks of bread for dipping. And wine, of course. It was a memorable meal.

Moroccan Fish 


Spread one tablespoon canola or peanut oil over the bottom of a large skillet or Dutch oven. 

  • Add a layer of sliced red or yellow potatoes, about two medium potatoes, unpeeled if you wish.
  • Add a layer of carrots, peeled and either sliced or cut into thin sticks (two or three medium carrots).
  • Add a layer of red bell pepper, cut in strips (one bell pepper)
  • Add a layer of sliced fresh ripe tomatoes, if they are in season, or you could use chopped roasted tomatoes, if you roasted and froze some of last year's crop. Or you could eliminate the tomatoes. In this case, it is better not to use canned.
  • Add five or six whole cloves of peeled garlic.
  • Add fresh seeded sliced hot chiles, or seeded and crumbled dried chiles, to taste. Or, if you would like it to be only a little spicy, add a sprinkle of crushed red chile flakes. Or forget about the chiles.
  • Place four pieces of salmon (or tuna, or talapia) on top. This is one time when it's just as good to use frozen fish, as opposed to fresh fish, because it's going to cook a long time. And frozen fish is usually much less expensive!

Put your pot with all its vegetables and fish on a medium high flame. When you hear it start to sizzle, add water to halfway up the vegetables. Cover and bring it to a boil.

While the pot's coming to a boil, make the sauce. In a bowl combine:


  • 1/3 cup canola or peanut oil
  • 1 teaspoon paprika
  • 1/2 teaspoon black pepper
  • 1/2 teaspoon sea salt
  • a dash of ground cumin
  • a dash of ground turmeric
  • a pinch of good saffron (optional, only if you have it)

When the pot boils, add one can of garbanzo beans, drained and rinsed. Then add the sauce over all. Cover and cook for 10 minutes. 

Uncover and cook for one hour over medium heat. The liquid should just evaporate, but the potatoes should not stick to the bottom, so you will need to keep an eye on it close to the end. 


Top with a handful of chopped cilantro and serve with Roasted Asparagus below. Yum!


Roasted Asparagus


Buy fat asparagus with fresh green tips. Trim the stems about an inch from the bottom, or where the stem turns woody. Carefully peel the lower half of each stem with a vegetable peeler.

Wash the asparagus briefly in running water and pat dry with a towel. In an wide baking pan, toss the asparagus with a tablespoon of olive oil and a teaspoon of sea salt. 

Roast in a preheated 400 degree F oven for 20 minutes. When you remove from the oven, drizzle a tablespoon of good Balsamic vinegar over the spears.

Make shavings of Parmigiano-Reggiano cheese with the vegetable peeler and sprinkle over the asparagus. Serve.


Thursday, November 6, 2014

Meat sauce with lotsa' stuff (pasta addiction)

Recipe: Penne with meat and vegetable sauce


I admit it, I'm a pasta addict. I just crave pasta - not every day, but frequently enough that you could say it's one of my favorite things to eat. It wasn't a surprise when one day last week my thoughts turned to pasta and what I could make with it. The cooler weather called for a sauce with a lot of taste, and I felt like meat. But sometimes meat sauce just doesn't have that extra oomph - you know, where you say "This is really good".

So I shopped in my fridge and came up with a winner. It took about 45 minutes to make, and not only did I love it, Wayne ate all the rest after I was done. Guess it passed the "really good" test!


Quick Penne with Meat and Vegetable Sauce


  • 2 slices thick bacon, diced
  • 1 tablespoon extra virgin olive oil
  • 1/2 pound ground turkey
  • 1/2 medium onion, chopped
  • 1/2 red padron pepper or other moderately spicy pepper, seeded and chopped
  • 1/2 cup robust red wine
  • A few chopped roasted tomatoes (this is from my roasted tomatoes recipe - if you don't have it, use a few sun-dried tomatoes or just eliminate it. You can also use canned fire-roasted tomatoes instead of the canned tomatoes below, and that will add a little of that roasted taste.)
  • 1 15-ounce can chopped tomatoes
  • 1 small eggplant cut into small cubes, enough to make about 1 cup of eggplant cubes
  • 1 teaspoon dried oregano
  • 6 garlic-stuffed green olives, chopped
  • A few tablespoons freshly grated Parmesan cheese
  • A few fresh basil leaves, torn just before using
  • 1/2 pound, or a little less, dried penne. I used quinoa and brown rice penne, which is gluten-free, but regular semolina penne will be delicious too, or rigatoni, or any other short-ish shaped pasta.
In a large skillet, fry the diced bacon until it is almost crisp. Add the olive oil, the chopped onion, and the chopped pepper and saute until the vegetables soften.

Add the ground turkey and cook, stirring with a wooden spoon to break up the pieces, until the meat is no longer pink. Add the wine and deglaze the pan, stirring hard to dislodge any goodies stuck on the bottom. Cook on medium high until the wine is almost gone.

Add the canned tomatoes and the chopped roasted tomatoes, if you are using them. Add the eggplant cubes and the oregano, and stir to mix well. Bring the mixture to a simmer, cover, and simmer on low heat for 30 minutes.

Meanwhile start heating a large pot of water for the pasta, although you won't actually cook the pasta until the sauce is nearly finished.

When the sauce has simmered for 30 minutes, add the chopped olives and cook for another 5 minutes. Turn off the heat and let the sauce sit while the pasta cooks.

Bring the pasta water to a full boil and add a tablespoon or two of sea salt. Add the pasta and cook until it is just tender. There is no way to ensure this without tasting it. After 6 or 7 minutes, scoop a piece of pasta out of the water and taste it. Taste it again a minute or two later. It's perfect when it is just chewy - not quite soft, but without any hard feel to it either. I find it is even more critical to avoid overcooking gluten-free pasta - I start tasting it at 6 minutes and I taste it every 45 seconds or so after that until it is perfect.

When the pasta is done, reserve 1/4 cup of the cooking water and then drain it thoroughly. Add the pasta to the sauce in the skillet and turn the heat on to medium for a couple of minutes, stirring and tossing the pasta with the sauce. Add some or all of the reserved pasta water to loosen things up. As soon as it's all hot and well mixed, ladle the pasta and sauce into bowls and sprinkle with the grated Parmesan and torn basil. Dig in.

Buon appetito!

This recipe is gluten-free if you use gluten-free pasta.


Wednesday, October 15, 2014

Ribs and potato salad (summer's last dance)

Recipes: Oven roasted BBQ ribs, Potato salad


A soul food treasure, BBQ ribs and potato salad are also a natural combination of tastes. At the end of summer, why not splurge on one last on-the-patio dinner? These ribs can be made all winter long, though, because they don't rely on an outdoor barbeque. They're done in the oven, slow and low. They. Are. The. Best. Ribs. Ever.

I've posted these recipes before, but they were buried along with other party recipes. Here they are in their full glory - a fabulous soulful dinner for the two of you.

Oven Roasted BBQ Ribs

  • 2-3 pound of pork ribs or babyback ribs

For the Rub:
  • 1/2 cup dark brown sugar
  • 3/4 teaspoon smoked salt (alderwood or cherrywood). You can get smoked salt at a spice shop or online)
  • 1 tablespoon sweet Hungarian paprika
  • 3/4 tablespoon garlic granules (not garlic salt)
  • 1/2 teaspoon ground red New Mexico pepper

Plus, for the finale
  • 1 1/2 cups BBQ sauce, make your own (recipe here), or your favorite bottled.
Preheat the oven to 300 degrees F.

Mix together the ingredients for the rub. Peel off tough membrane that covers the bony side of the ribs by inserting a dinner knife or spoon under it and working it off with your fingertips. (This isn't necessary with babyback ribs.) Apply the rub to all surfaces of the ribs.

Cover a baking sheet with two layers of aluminum foil, shiny side out. lay the ribs on the foil meaty side down. Cover the ribs with two more layers of foil and crimp the edges tightly.

Roast for 2 to 2-1/2 hours, or until the meat starts to shrink away from the bones. Remove the ribs from the oven.

Heat the broiler to High.

Remove the top layers of foil. Cut the ribs into serving pieces (2 or 3 ribs per piece). Arrange them, bony side up, on the foil covered baking sheet and brush them with BBQ sauce. Slide under the broiler and broil for 2 minutes, or until the ribs darken a bit.

Turn the ribs over, brush on BBQ sauce, and repeat on the other side.

While the ribs are roasting, make the potato salad so that it can chill in the fridge for at least one hour.

Potato Salad


This potato salad recipe came from my friend Donna in Clearwater, Florida, and it is by far the best I've ever tasted.

  • 4 medium red potatoes, cut in quarters and boiled or steamed until soft.
  • 1 tablespoon white vinegar
  • 1/2 tablespoon sugar
  • 3 hard-boiled eggs, sliced or diced
  • 1/2 small onion, diced
  • Mayonnaise to taste, about 3 tablespoons
  • 1/2 tablespoon brown or Dijon mustard
  • 3/4 teaspoon celery salt
  • Freshly ground black pepper

Let potatoes and eggs cool. Leave skin on red potatoes and cut them into bit-size pieces and put them in a medium sized serving bowl.

Sprinkle the potatoes with vinegar, then sugar. Stir.

Add chopped eggs and onions.

Add mayonnaise, mustard, celery salt, and ground pepper to taste.

Mix together, then put in the fridge to cool and blend the flavors. Yum!

Buon appetito! It's gonna be good!!